Tag: Top Picks

How Many Eyes Does Zubat Have Pokemon Details...
Zubat has been a staple creature in the Pokémon franchise since the original Generation I games, famous for appearing in almost every dark cave across various regions. Despite its frequent appearances in battles and wild encounters, many players often wonder about the precise physical design of this bat-like creature. The short answer to how many eyes Zubat has is zero.
The Official Physical Design of Zubat
According to official Pokédex entries across multiple game titles, Zubat completely lacks eyes. Its face features a prominent open mouth with small fangs and large pointed ears, but no eye sockets or visual organs are present. Over generations of living in pitch-black subterranean environments, Zubat evolved to function without visual sight.
Because Zubat has no eyes, it relies entirely on echolocation to navigate its surroundings safely. By emitting high-frequency ultrasonic waves from its mouth, the Pokémon detects obstacles, tracks prey, and flies effortlessly through narrow cave networks. This biological adaptation makes eyes entirely unnecessary for its survival in dark habitats.
Zubat in Pokémon In-Game Puzzles and Lore
Zubat's lack of eyes is not just a piece of obscure background lore; it serves as a central detail in specific video game challenges. In Pokémon Legends: Arceus, players encounter the legendary Pokémon Uxie, who presents a famous counting riddle during the main storyline. Uxie asks players to count the total eyes of five specific Pokémon: Combee, Zubat, Unown, Magneton, and Dusclops.
To solve Uxie's puzzle correctly, players must know the exact eye count for each creature in order. Because Combee has six eyes, Zubat has zero, Unown has one, Magneton has three, and Dusclops has one, the solution sequence is 60131. Zubat's figure of zero is crucial for getting the correct answer and progressing through the quest.
Common Misconceptions About Zubat's Vision
Some players mistakenly assume Zubat has small or covered eyes that open during specific animation frames, but official artwork confirms it has smooth skin where eyes would normally sit. Additionally, its evolution Golbat develops large visible eyes, which often causes confusion for fans tracking the evolutionary line.
Interesting quirks also exist within game mechanics, such as Zubat being able to learn moves like Mean Look despite lacking eyes to perform the action. These funny mechanical oversights remain popular topics of discussion within the gaming community. Ultimately, official Pokémon biology consistently maintains that Zubat lives as a completely eyeless creature.

How To Change PlayStation Email Address Without Losing...
Updating the sign-in ID for your PlayStation Network account is a straightforward process that allows you to maintain access to your entire game library. Many players worry that changing their registered email address will result in losing purchased digital games, save data, or trophies. Fortunately, Sony links all your digital assets to your unique account ID rather than the email address itself, making the transition seamless.
Understanding How PlayStation Account Data Is Stored
Your PlayStation purchases, licenses, and gameplay achievements are permanently bound to your core PSN account. Updating your email address merely changes the credential you use to log in and receive official notifications. Because your games remain tied to your primary profile, updating your contact details will not clear your transaction history or revoke access to installed titles.
Before initiating the change, ensure you have active access to the new email address you intend to use. Using an accessible inbox is crucial because Sony requires verification before finalizing any account modifications. Additionally, double-check that the new email is not already associated with another active PlayStation Network profile.
Changing Your Email Address via Web Browser
The easiest method to modify your account credentials is through a standard internet browser on your computer or mobile device. Navigate to the official PlayStation Account Management sign-in page and log into your current account. Once signed in, select the Security tab from the navigation menu and locate the Sign-in ID section to edit your email address.
Enter your new email address carefully and confirm the change when prompted. Sony will instantly dispatch a verification link to your new inbox. Open the email message, click the verification link, and return to the account page to finish linking your new sign-in ID.
Updating Credentials Directly on PS4 or PS5 Consoles
You can also complete this update directly from your gaming console settings. On a PS5, navigate to Settings, select Users and Accounts, and open the Account section to find your Sign-in ID settings. On a PS4 console, go to Settings, choose Account Management, select Account Information, and enter the Sign-in ID menu.
Enter your updated email address and confirm your current password to authorize the adjustment. After submitting the change, check your email inbox on another device to click the required confirmation link. Once verified, you can log back into your console without losing any digital purchases or cloud save files.
Securing Your Account After the Update
After updating your sign-in email address, it is a great time to review your overall account security settings. Enabling two-step verification adds an essential layer of protection against unauthorized login attempts. You may also want to re-verify your payment methods and review your account privacy settings to keep your gaming profile fully safe.

Best Gun For MW3 Zombies Powerful Weapons And...
Surviving the undead hordes in Modern Warfare 3 Zombies requires a combination of mobility, fire rate, and high damage output. Selecting the right weapon build can mean the difference between successful extraction and losing your hard-earned gear in high-threat zones. Players looking to optimize their setup must understand which firearms excel when upgraded with Pack-a-Punch and specialized attachments.
Top Meta Weapons for MW3 Zombies
The FJX Horus submachine gun has emerged as one of the most effective options for clearing hordes in high-tier zones. Its extremely rapid rate of fire, combined with high mobility, allows players to outrun aggressive undead while inflicting massive damage. Equipping conversion kits or high-capacity magazines ensures you maintain continuous firepower during intense encounters.
For players who prefer heavy damage at close range, the Lockwood 680 shotgun loaded with 12 Gauge Slug ammunition remains a top-tier contender. When Pack-a-Punched, the slug rounds split into multiple high-damage projectiles that decimate elite bosses and armored enemies with ease. Pairing it with mobility-focused attachments allows you to navigate crowded urban streets without getting trapped.
Recommended Loadout Attachments and Setup
Optimizing your chosen firearm requires selecting attachments that maximize ammunition capacity and reduce aim-down-sight speed. Extended drum magazines or specific conversion kits are essential for sustained firefights against massive zombie waves. Underbarrel grips and suppressors also assist with recoil control and keeping your weapon steady during sustained fire.
Secondary weapons should complement your primary build by offering utility or rapid mobility. Handguns like the Renetti with conversion kits or fast-handling SMGs allow players to sprint quickly across dangerous zones. Choosing the right combination ensures you remain versatile during both contract missions and boss encounters.
Essential Tactical Equipment and Field Upgrades
Beyond your main firearms, tactical equipment plays a crucial role in maintaining control over chaotic situations. Decoy grenades and Kazimir black holes are indispensable tools for distracting massive groups of zombies while reviving teammates or exfilling. Carrying reliable lethal options like Molotovs or Semtex further aids in managing tight choke points.
Field upgrades such as Frenzied Guard or Aether Shroud provide emergency escape options when surrounded by special enemies. Frenzied Guard repairs your armor completely while drawing attention, making it vital for team play in high-threat areas. Integrating these equipment choices with a powerful weapon build completes a well-rounded loadout designed for survival.

What Kind Of HDMI Cable Comes With PS5...
Setting up a PlayStation 5 involves understanding its hardware capabilities to ensure you get the best performance on your TV or monitor. Many players wonder about the specific cable included in the box and whether it supports modern visual standards like 4K resolution at high refresh rates. Knowing what comes with your console helps you configure your entertainment setup correctly without purchasing unnecessary extra accessories.
The Included PS5 HDMI Cable Type
Sony packages an HDMI 2.1 Ultra High Speed cable inside every official PlayStation 5 box. This specific grade of cable is designed to support total bandwidth capabilities of up to 48Gbps for high-end audio and video signals. Using the stock cable ensures your console can transmit uncompressed video data straight to compatible displays.
Because HDMI 2.1 is backward compatible, this cable works seamlessly with older HDMI 2.0 or 1.4 displays as well. However, plugging it into an older television simply caps the output at that display's maximum supported performance. Players do not need to buy third-party cables to unlock the console's full graphical power upon unboxing.
Understanding 4K 120Hz and HDMI 2.1 Capabilities
The primary advantage of the included Ultra High Speed cable is its support for 4K video resolution at a 120Hz refresh rate. Higher refresh rates deliver smoother motion and reduced input latency in supported high-action video games. To experience this feature, both your display panel and its active port must support the HDMI 2.1 protocol.
Additionally, the included cable enables Variable Refresh Rate and Auto Low Latency Mode on modern gaming televisions. These dynamic features eliminate screen tearing and minimize response times during intense gameplay sessions. Without a proper Ultra High Speed cable, these advanced visual modes remain inactive or greyed out in system menus.
How to Properly Connect Your PS5 to Your Display
To establish an optimal connection, plug one end of the HDMI cable into the port on the back of the console. Insert the opposite end into a port on your TV that explicitly supports HDMI 2.1 features. Many televisions restrict full 120Hz bandwidth to specific designated ports, so checking the back panel labels is essential.
Avoid routing the cable through older soundbars or audio receivers that lack HDMI 2.1 passthrough functionality. Connecting directly to the television ensures you do not accidentally bottleneck the console's video transmission rate. If using external audio systems, utilize your TV's eARC port for high-quality audio routing.
Configuring PlayStation 5 Screen and Video Settings
After physical installation, power on your console and navigate to the Screen and Video menu in System Settings. Under the Video Output tab, verify that your resolution is set to Automatic or 2160p for 4K displays. You can also test your current output signal to verify if 120Hz modes are active.
If VRR options are unavailable, double-check your TV's picture mode settings to enable enhanced HDMI format options. Many televisions require manual toggles to enable full HDMI 2.1 bandwidth on individual inputs. Once correctly adjusted, your console automatically delivers optimal performance across all your favorite games.

How Much Stardust To Trade Pokemon Go Costs...
Trading in Pokemon Go allows players to share rare catches, complete regional Pokedex entries, and reroll IV stats with nearby friends. However, every exchange demands a fee in Stardust, which varies dramatically based on your friendship tier and the type of monster being swapped. Understanding these scaling costs helps trainers plan high-value trades efficiently without bankrupting their resource reserves.
How Friendship Tiers Reduce Trading Costs
Building closer bonds with fellow trainers is the single most effective way to lower trading fees in Pokemon Go. As you progress from Good Friends up to Best Friends, the game applies massive discounts to every exchange. High-level friendships can reduce overall resource requirements by up to ninety percent, making patience extremely valuable.
Standard trades involving common wild creatures require very little investment even at entry-level friendship tiers. For instance, swapping ordinary Pokemon with a Good Friend costs just one thousand Stardust, dropping to a mere one hundred Stardust at Best Friend status. Building daily interaction streaks ensures you always pay the lowest possible rate.
Standard Versus Special Trades
Pokemon Go categorizes swaps into standard exchanges and Special Trades, each carrying completely different financial brackets. Special Trades include Legendary Pokemon, Shiny variants, and any creature not currently registered in the receiving player's Pokedex. Because these trades involve premium assets, their initial baseline fees are significantly higher.
Unregistered Shiny or Legendary creatures require a massive upfront payment of one million Stardust at the Good Friend tier. However, reaching Ultra Friend status drops this amount down to eighty thousand, while Best Friends pay only forty thousand Stardust. Planning these high-tier swaps ahead of time saves hundreds of thousands of valuable resources.
Managing Stardust Resources for Lucky Trades
Once you reach Best Friend status, continuing to interact daily gives a chance to trigger a Lucky Friend status. A Lucky Trade guarantees that both traded Pokemon will become Lucky, giving them heightened stats and a permanent fifty percent discount on future powering-up costs. This status provides incredible value when exchanging meta-relevant raid attackers.
Preparing a dedicated list of priority monsters ensures you capitalize on every Lucky opportunity that arises. Combining Lucky status discounts with regular friendship cost reductions yields the most efficient progression path in the game. Wise trainers always hold off on trading rare unregistered forms until their friendship levels are fully maximized.

Do Gameboy Games Have Batteries And How Save...
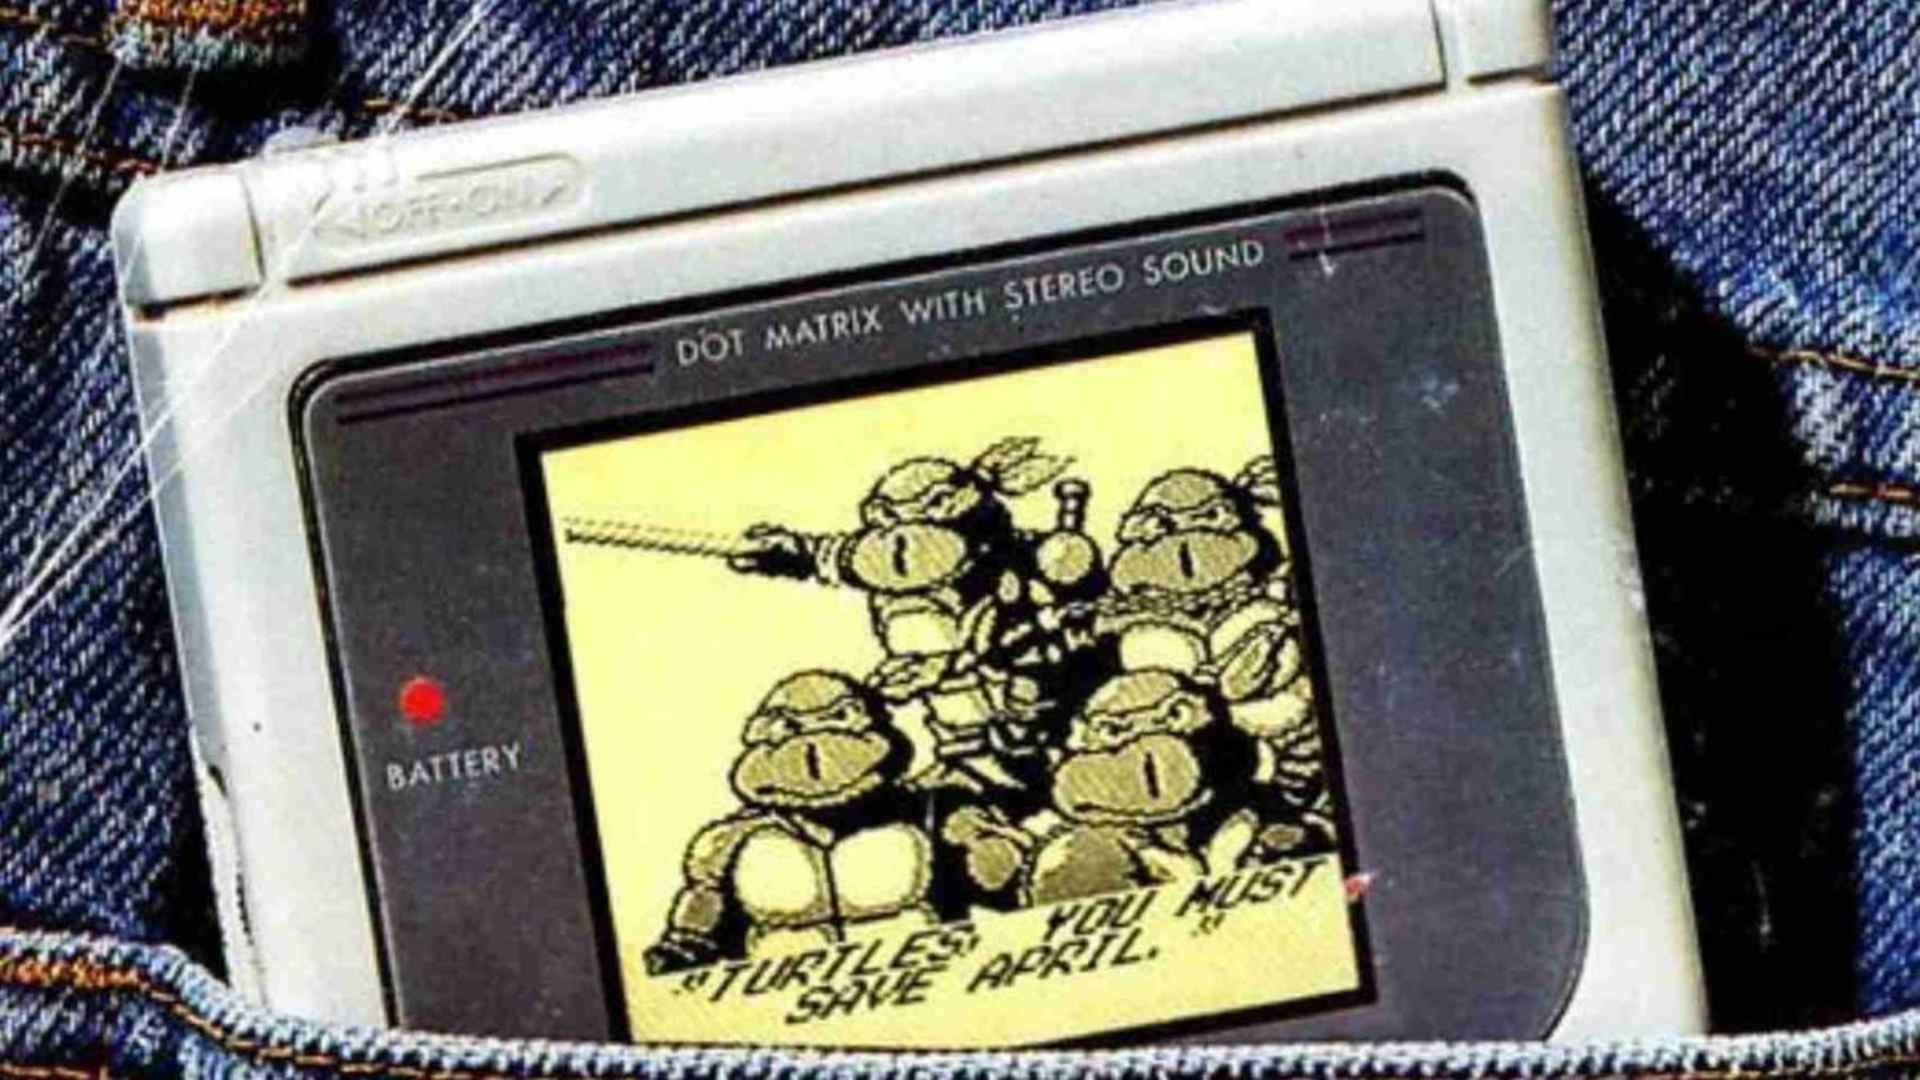
Retro gaming enthusiasts often wonder how classic Gameboy cartridges managed to keep progress stored for decades without modern cloud saves or internal flash drives. The mechanism behind Gameboy save files is rooted in early memory technology that relied on small internal hardware components. Understanding how these vintage systems retain memory helps players preserve their favorite classic titles today.
The Role of Internal Batteries in Gameboy Cartridges
Many Gameboy cartridges contain a small lithium coin battery, typically a CR1616 or CR2025, soldered directly onto the internal circuit board. This battery powers the volatile Static RAM chip that holds your saved game data when the console is turned off. Without a continuous supply of electricity from this cell, the RAM chip loses power and forgets the saved progress completely.
Not every Gameboy game uses a battery to preserve save states because some simpler games relied on password systems instead. However, titles with complex progression systems like RPGs almost always featured an internal power cell. Over time, these batteries naturally deplete, leading to unexpected loss of stored save files.
How SRAM Technology Keeps Your Progress Safe
Static Random-Access Memory serves as the primary storage area for save files inside standard Gameboy game cartridges. Unlike non-volatile memory used in modern devices, SRAM requires constant electrical voltage to retain any written information. As long as the battery provides uninterrupted current, the SRAM chip safely retains player statistics and progress.
When a player turns on the console, the system reads data from the SRAM to resume the adventure right where it ended. If the circuit is broken or the battery voltage drops too low, the data vanishes permanently. This delicate dependency explains why vintage handheld games require careful maintenance over time.
Flash Memory and Alternative Save Methods
Later in the Gameboy Advance era, developers began transitioning to FRAM and flash memory chips for save file storage. These newer technologies do not require a constant electrical charge to maintain stored data over long periods. As a result, games utilizing flash memory can hold save files almost indefinitely without risking battery drain.
Some later Gameboy cartridges included batteries solely to power real-time clock functions rather than holding save data. In those specific titles, a dead battery stops in-game day and night cycles while leaving saved games intact. Recognizing these differences helps collectors diagnose whether a cartridge needs soldering or simple cleaning.
Replacing Cartridge Batteries to Preserve Classic Games
Replacing a depleted Gameboy battery requires opening the plastic casing with a specialized gamebit screwdriver. Gamers can solder a fresh tabbed coin battery onto the circuit board to restore full save functionality for another decade. Taking proper precautions during soldering ensures the circuit board remains undamaged throughout the repair process.
Retro collectors also utilize dedicated hardware tools to back up precious save files to a PC before replacing the old cell. Transferring file copies allows players to safeguard childhood memories prior to disconnecting the original power source. Taking preventative steps guarantees that vintage gaming libraries remain playable for future generations.

Five Nights Of Freddy Chica Character And Appearance
As one of the original four animatronics in the iconic survival horror franchise, Chica holds a special place in the lore of Five Nights at Freddy's. Serving as the backup singer in Freddy Fazbear's band, her cheerful aesthetic contrasts sharply with her terrifying role as an active antagonist. Understanding her visual design and overall character traits provides deeper insight into how the series crafts its signature horror atmosphere.
The Iconic Visual Design of Classic Chica
Chica is depicted as a bright yellow animatronic chicken with magenta eyes, three tufts of feathers on her head, and a solid orange beak. She wears a distinctive white bib featuring the phrase "LET'S EAT!!!" rendered in yellow bubble letters with purple outlines. Interestingly, she is the only member of the original band whose jaw is directly attached to her head rather than articulated separately.
A notable aspect of her physical build is the presence of human-like teeth set inside her beak, alongside visible endoskeleton teeth in the back of her mouth. In her left hand, she almost always carries Mr. Cupcake, a small companion character adorned with pink frosting and a single birthday candle. This pairing reinforces her food-centric motif while adding an unsettling layer of uncanny detail to her appearance.
Variations and Evolution Across the Games
Throughout the franchise, Chica's appearance undergoes several dramatic redesigns to match the evolving storyline. In Five Nights at Freddy's 2, her Withered form reveals severe damage, missing hands, and an unhinged jaw exposing sharp endoskeleton wires. Conversely, Toy Chica introduces a sleeker, plastic finish and a more feminine silhouette designed to appear child-friendly during daytime operations.
Later iterations, such as Nightmare Chica and Glamrock Chica, further expand on her core design elements. While Nightmare Chica features terrifyingly sharp teeth and broken suit panels, Glamrock Chica embraces an 1980s neon aesthetic with vibrant pink accessories. These stylistic shifts showcase how the developers continually reinvent her look while preserving her recognizable traits.
Character Behavior and Atmospheric Lore
Beyond her appearance, Chica is defined by her distinct behavior during gameplay. In the original title, she approaches the player's office strictly from the right side and can be heard rumbling pots and pans inside the kitchen. Her presence near the security guard is often signaled by eerie, groaning vocalizations that heighten the tension.
According to underlying game lore, Chica is possessed by the spirit of Susie, who is believed to be one of the earliest victims in the Missing Children Incident. This tragic backstory gives her hostile actions a compelling narrative foundation within the broader horror saga. Her enduring presence across games, spin-offs, and media adaptations cements her legacy as a pillar of modern indie gaming horror.

How To Save Forza Horizon 5 Understanding Autosave...
Navigating the vibrant open world of Forza Horizon 5 requires players to complete races, unlock vehicles, and accumulate credits across various event types. Because the game does not feature a traditional manual save option in the pause menu, understanding how saving works is essential to protect your hard-earned progress. Knowing when the game saves ensures that you never lose hours of gameplay due to an unexpected quit or crash.
How the Autosave System Works
Forza Horizon 5 relies on an automated cloud and local save mechanic that triggers during key activities. The game automatically records your data whenever you finish a race, purchase a car, modify a vehicle, or complete festival playlist tasks. A small spinning loading icon appears in the bottom corner of your screen whenever an autosave event occurs.
Relying purely on passive exploration can sometimes leave recent activities unrecorded if you exit the game abruptly. To ensure your latest progress is safe, always avoid quitting the application while mid-event or immediately after closing a menu. Allowing the background synchronization to complete prevents data corruption and lost achievements.
How to Force a Manual Save
While there is no dedicated save button, you can easily trigger a save on command through specific in-game actions. The most reliable method is traveling to any player house or Horizon Festival outpost on the map. Entering and exiting these locations forces the system to sync your profile to the servers immediately.
Another effective technique involves making a minor modification to any owned car inside your garage. Changing a car's paint color, applying a new tuning setup, or buying a cheap upgrade forces an immediate save file update. Checking for the saving indicator after exiting the garage guarantees that your recent earnings are securely stored.
Properly Exiting the Game
Exiting the game improperly is one of the primary causes of lost progress and save corruption across platforms. On PC, always navigate to the settings menu and choose the option to exit to the desktop instead of force-closing the window. Console players should return to the home dashboard only after returning to free-roam mode from a festival hub.
Features like Quick Resume on Xbox consoles can occasionally interrupt proper cloud synchronization during longer play sessions. To prevent save sync errors, it is best practice to fully close the game before shutting down your system. Taking these small precautions keeps your profile intact across all supported platforms.
Managing Cloud Sync and Progression Safety
Your save profile is continuously backed up to cloud servers tied to your account credentials. Maintaining a stable internet connection during your session allows real-time updates to pass smoothly without creating discrepancies. If you encounter network drops, wait until connectivity is restored before closing your session.
Understanding these underlying mechanics allows you to focus on expanding your garage and enjoying the road. By routinely forcing saves before logging off, your festival journey remains completely safe. Consistent save habits safeguard your rare cars, credits, and event completions for the long term.

How To Save Forza Horizon 5 Understanding Autosave...
Navigating the vibrant open world of Forza Horizon 5 requires players to complete races, unlock vehicles, and accumulate credits across various event types. Because the game does not feature a traditional manual save option in the pause menu, understanding how saving works is essential to protect your hard-earned progress. Knowing when the game saves ensures that you never lose hours of gameplay due to an unexpected quit or crash.
How the Autosave System Works
Forza Horizon 5 relies on an automated cloud and local save mechanic that triggers during key activities. The game automatically records your data whenever you finish a race, purchase a car, modify a vehicle, or complete festival playlist tasks. A small spinning loading icon appears in the bottom corner of your screen whenever an autosave event occurs.
Relying purely on passive exploration can sometimes leave recent activities unrecorded if you exit the game abruptly. To ensure your latest progress is safe, always avoid quitting the application while mid-event or immediately after closing a menu. Allowing the background synchronization to complete prevents data corruption and lost achievements.
How to Force a Manual Save
While there is no dedicated save button, you can easily trigger a save on command through specific in-game actions. The most reliable method is traveling to any player house or Horizon Festival outpost on the map. Entering and exiting these locations forces the system to sync your profile to the servers immediately.
Another effective technique involves making a minor modification to any owned car inside your garage. Changing a car's paint color, applying a new tuning setup, or buying a cheap upgrade forces an immediate save file update. Checking for the saving indicator after exiting the garage guarantees that your recent earnings are securely stored.
Properly Exiting the Game
Exiting the game improperly is one of the primary causes of lost progress and save corruption across platforms. On PC, always navigate to the settings menu and choose the option to exit to the desktop instead of force-closing the window. Console players should return to the home dashboard only after returning to free-roam mode from a festival hub.
Features like Quick Resume on Xbox consoles can occasionally interrupt proper cloud synchronization during longer play sessions. To prevent save sync errors, it is best practice to fully close the game before shutting down your system. Taking these small precautions keeps your profile intact across all supported platforms.
Managing Cloud Sync and Progression Safety
Your save profile is continuously backed up to cloud servers tied to your account credentials. Maintaining a stable internet connection during your session allows real-time updates to pass smoothly without creating discrepancies. If you encounter network drops, wait until connectivity is restored before closing your session.
Understanding these underlying mechanics allows you to focus on expanding your garage and enjoying the road. By routinely forcing saves before logging off, your festival journey remains completely safe. Consistent save habits safeguard your rare cars, credits, and event completions for the long term.

Where Is The Steed Stone In Skyrim And...
The Elder Scrolls V: Skyrim features various magical monoliths across its northern expanse, but few offer as much practical utility as the Steed Stone. Located high atop the snow-covered peaks in Haafingar, this ancient structure grants powerful passive bonuses that drastically overhaul inventory management and character mobility. Knowing how to navigate the rugged terrain to discover this location will make your journey across Tamriel significantly easier.
Exact Map Location of the Steed Stone
To reach the Steed Stone, travelers should head toward the far northwestern corner of the Skyrim map, situated within the Haafingar hold. It sits on a high mountain ridge located directly northwest of the major city of Solitude. Players can also use the Statue of Meridia or Ironback Hideout as nearby geographical landmarks when charting their path.
If you are traveling on foot, starting from Solitude provides the most straightforward path toward the stone. Simply exit the city gates and follow the main northern road through the mountainous hills. Keep heading northwest past Wolfskull Cave until you spot the towering stone monolith on the cliff edge.
Step-by-Step Navigation and Travel Tips
Ascending the mountain terrain can be tricky due to steep drop-offs and winding mountain trails. Following established dirt roads rather than climbing sheer cliffs prevents falling damage and unexpected delays. Bringing a horse or using stamina-boosting potions can also accelerate your ascent up the snowy peaks.
While the path to the shrine is relatively peaceful, wild beasts and hostile bandits occasionally patrol the nearby wilderness. It is wise to prepare basic combat gear or defensive spells before making the trek. Once you reach the summit, the stone stands isolated on an open rocky ledge overlooking the surrounding frozen landscape.
Key Benefits and Character Buffs Explained
Activating the Steed Stone immediately grants two exceptional active effects to your character. First, it increases your total carrying capacity by 100 points, allowing you to haul far more loot during dungeon runs. This makes it an ideal blessing for players who frequently struggle with inventory space limitations.
Second, the stone completely removes the weight and movement penalties of your equipped armor. Heavy armor wearers can sprint at full speed without wasting stamina or suffering stealth penalties. This combination of mobility and storage capacity makes it one of the best Standing Stone choices in the game.

Mazda RX 8 Fast And Furious Appearance And...
The Mazda RX-8 holds a distinctive place in automotive cinema history thanks to its memorable appearance in The Fast and the Furious: Tokyo Drift. Driven by the character Neela, the sleek rotary-powered sports car showcased a unique blend of style and agility amidst the high-octane street racing scenes of Tokyo. Beyond its striking aesthetics, the vehicle's inclusion highlighted the emerging tuner culture of the mid-2000s and solidifies its status among JDM fans.
The Cinematic Role of Neela's Mazda RX-8
In the third installment of the franchise, the Mazda RX-8 serves as the primary vehicle for Neela. It stands out with a customized multi-tone finish, aftermarket VeilSide body enhancements, and high-performance wheels tailored for drift culture. The car is showcased during key drifting sequences, proving its capability alongside other legendary Japanese sports cars on screen.
Behind the Scenes Performance and Modifications
While the standard production RX-8 relies on a naturally aspirated Renesis rotary engine, the hero car used in filming featured custom aftermarket performance upgrades. Automotive journalists tested the actual movie vehicle and noted custom forced induction modifications designed to boost power. Film crews built multiple versions of the coupe to handle intense driving maneuvers and dynamic camera angles required during production.
Legacy and Impact on Rotary Enthusiasts
The appearance of the Mazda RX-8 helped boost interest in rotary engine platforms during the mid-2000s. Enthusiasts often recreate its iconic livery and body kit setup to pay homage to the franchise. Today, it remains one of the most recognizable vehicles from the Tokyo Drift era, representing a pivotal era in Japanese sports car design.

How Do Betting Lines Work in Soccer and...
Understanding soccer betting lines is essential for anyone looking to evaluate match outcomes and potential payouts accurately. Because soccer allows three distinct match results—a home win, an away win, or a draw—the wagering odds operate differently than two-way sports like basketball or American football. Learning how oddsmakers set these lines empowers fans to analyze match statistics with greater clarity and precision.
The Core Structure of Three-Way Soccer Odds
The most common soccer market is the traditional 1X2 line, which covers normal regulation time plus stoppage time. The number 1 represents the home team, X signifies a draw, and 2 indicates the visiting squad. Each outcome is assigned specific odds based on implicit probabilities calculated by oddsmakers before kickoff.
Decimal odds are widely used globally, representing the total return on a winning stake inclusive of the initial wager. For instance, backing a home team at odds of 2.10 means a successful outcome returns more than double the stake. Understanding these baseline figures helps bettors calculate value quickly across different match listings.
Understanding Goal Lines and Asian Handicaps
In addition to standard match results, goal lines offer alternative options by focusing on overall scoring rather than match winners. The over/under line sets a predicted total number of goals, allowing fans to wager on whether the combined score will exceed or fall short of that benchmark. These markets are particularly popular when two evenly matched teams face each other in tight defensive battles.
Asian Handicap markets eliminate the draw option by giving one team a virtual advantage or disadvantage before the game starts. For example, a favorite might start with a minus handicap, requiring them to win by two or more goals for the bet to pay out fully. Exploring diverse line options on established platforms like m88 provides valuable context on how line movements reflect market confidence prior to kickoff.
Interpreting Line Movement Before Kickoff
Soccer betting lines are rarely static, constantly fluctuating leading up to matchday based on incoming news and market volume. Key factors such as squad rotations, unexpected injury updates, and tactical adjustments heavily influence price changes. Monitoring these adjustments reveals where public sentiment and sharp analysis are driving the odds.
A sudden shift toward a team often signals crucial developments, such as a star player returning to the starting lineup. Conversely, lines that drift outward suggest declining confidence from the broader wagering community. Paying close attention to these subtle movements helps bettors identify timing advantages before placing their selections.
Practical Tips for Reading Soccer Odds Effectively
To read soccer lines effectively, always compare prices across multiple bookmakers to secure the best available market rate. A minor difference in decimal odds can significantly affect long-term returns over the course of a long league season. It is equally important to focus on contextual variables such as home-field advantage, congested fixture schedules, and head-to-head records.
Developing a systematic approach ensures that decision-making remains grounded in objective data rather than emotional bias. Evaluating how lines shift relative to team form allows supporters to appreciate the deeper strategic nuances behind every match line-up. Ultimately, mastering line interpretation turns raw numerical data into actionable insight for every fixture.

Rick And Morty Rainbow Six Siege Exploring The...
The unexpected collaboration between the animated sci-fi hit Rick and Morty and Ubisoft's tactical shooter Rainbow Six Siege created a major stir across both gaming and pop culture communities. By bringing eccentric cartoon aesthetics into a grounded competitive shooter, the crossover provided players with uniquely humorous cosmetic bundles for operators like Doc, Fuze, Thermite, and Sledge. This distinctive clash of artistic styles not only refreshed in-game customization but also sparked an explosion of fan art across social media platforms.
The Genesis of the Tactical Crossover
Ubisoft introduced the Rick and Morty crossover bundles to bring a lighter, absurd tone to Rainbow Six Siege's tense tactical environment. Players were suddenly able to breach walls dressed as Pickle Rick or equip weapon skins featuring Mr. Meeseeks and Portal Guns. The contrast between high-stakes tactical gameplay and animated comedy quickly caught the attention of casual and hardcore fans alike.
These cosmetic packs proved that tactical shooters could embrace playful pop culture references without losing their core competitive appeal. The success of the initial releases paved the way for multiple waves of themed content, further embedding adult animation into tactical gaming. As a result, the partnership became a prime example of successful modern gaming crossovers.
How Fan Art Transformed the Collaboration
Following the official content release, digital artists and gaming enthusiasts began sharing their own creative takes on the crossover across platforms like Reddit and Twitter. Fan artists reimagined other Rainbow Six Siege operators in the iconic art style of Justin Roiland, giving characters like Caveira and Jaeger animated makeovers. These fan-made illustrations expanded the universe far beyond what was officially available in the game store.
The creative community also explored darker, more narrative-driven art concepts that blended the sci-fi lore of Rick and Morty with the realistic gear of Team Rainbow. By merging detailed military gear with chaotic sci-fi gadgets, artists produced stunning posters and custom wallpapers that gained widespread appreciation. This community involvement helped keep the momentum of the crossover alive long after its initial announcement.
Impact on Gaming Culture and Cosmetic Design
The fusion of Rick and Morty with Rainbow Six Siege highlights how video game cosmetics have evolved from simple camo patterns into full pop culture statements. Players today enjoy expressing their favorite TV shows and internet memes while competing in rank-focused matches. This trend has encouraged developers to think outside traditional design boundaries when planning future collaborations.
Ultimately, the partnership demonstrated the immense power of combining distinct fandoms through both official cosmetics and grassroots fan creations. By bridging the gap between animated comedy and tactical combat, the event left a lasting legacy on character customization in competitive games. It remains a favorite topic among players who appreciate creative visual design in modern gaming.

Stay On Target Lego Star Wars Mission Guide...
Navigating the iconic climax of Episode IV in LEGO Star Wars: The Skywalker Saga requires precision, good timing, and a clear understanding of vehicle combat mechanics. As the final story level in the original movie chapter, Stay On Target puts players behind the wheel of an X-Wing to destroy the Death Star. Completing every level challenge while collecting all hidden collectibles creates a rewarding experience for completionists.
Mastering the Trench Run Challenges
During the initial phase of the assault, players must keep an eye out for specific targets to fulfill mission objectives. Focusing on wall turrets and enemy interceptors helps you finish the Hope That's Insured challenge early in the run. Maintaining continuous laser fire ensures that stray targets are hit before they leave your field of view.
As you progress through the dogfight, Darth Vader joins the battle to test your flying skills. Executing barrel rolls and loop maneuvers when prompted will easily clear the Clever Flying requirement. Staying mobile prevents incoming missile damage while allowing you to position your starfighter effectively.
Damaging Vader's Ship and Securing Minikits
To complete the final challenge, That's Not Going to Buff Out, players need to locate Darth Vader's advanced vessel amid the chaotic space battle. Targeting his craft with a volley of proton torpedoes quickly weakens his defenses and forces a retreat. Taking time to maneuver around the arena gives you the opportunity to spot extra items scattered across the zone.
Finding all five minikits requires checking every corner of the sky during both the trench and open flight phases. Small mini TIE fighters and floating cargo crates often hold these hidden rewards. Shooting glowing structures along the trench walls also reveals collectibles that are easily overlooked during high-speed runs.
Final Assault and Thermal Exhaust Port Tips
The culmination of the mission demands a accurate torpedo lock on the exhaust port to achieve victory. Balancing speed adjustments with careful aiming makes it much easier to strike the main target without crashing. Completing the level rewarded with True Jedi status guarantees full percentage progress for Episode IV.
Replaying the level in free play mode allows you to clean up any missed objectives without story constraints. Utilizing distinct ship types can also make targeting enemy turrets and floating containers more manageable. With a focused strategy, players can master the Death Star trench run and secure a complete victory.
Where Is Boc After Coastal Cave Elden Ring...
Helping Boc the Seamster retrieve his stolen belongings from the Coastal Cave in Elden Ring is a major turning point for his storyline. Once you hand over the Sewing Needle and Tailoring Tools, the gentle demi-human vanishes from Limgrave to offer his garment alteration services elsewhere. Tracking his movements across the Lands Between requires following his journey north as you open up new regions.
Finding Boc in Liurnia of the Lakes
After leaving the Coastal Cave, Boc travels north into Liurnia of the Lakes. Players can first encounter him kneeling right next to the Lake-Facing Cliffs Site of Grace after clearing Stormveil Castle. If he does not appear immediately, resting at the Site of Grace will cause him to spawn and offer free equipment adjustments.
As you venture further into Liurnia, Boc eventually moves toward the East Raya Lucaria Gate Site of Grace. Resting at this checkpoint allows you to trigger his next location and speak with Melina about his background. Providing him with the Gold Sewing Needle found at the Church of Vows opens up options to alter legendary boss armors.
Locating Boc on the Altus Plateau
Once players make their way to the Altus Plateau, Boc relocates to the Altus Highway Junction Site of Grace. At this spot, he expresses deeper gratitude for your companionship and asks permission to address you as his lord. Accepting his request rewards you with the My Lord gesture and solidifies his loyalty.
If you miss speaking with him at the highway junction, Boc will remain available or move further along as you reach the capital gates. Keeping track of his locations ensures you never lose access to his free tailoring service throughout the mid-game content.
Following Boc into Leyndell Royal Capital
Inside Leyndell, Royal Capital, Boc takes up his final regular position near the East Capital Rampart Site of Grace. Resting at this location prompts him to reflect on his appearance and express a desire to be reborn through Rennala's magic. This conversation marks the emotional climax of his entire questline and determines his ultimate fate.
To save Boc from a tragic end, players must refrain from handing him a Larval Tear. Instead, using the Prattling Pate item that says "You're Beautiful" in front of him reassures the seamster and allows him to remain safely at your service.

Where To Find Mankey In Pokemon Scarlet Location...
Finding Mankey early in Pokémon Scarlet is a priority for many trainers looking to add a reliable Fighting-type ally to their team. This classic creature is not only great for tackling early Gym battles, but it also evolves into powerful forms later in the game. Knowing the precise spawn areas and proper catching strategies ensures you can secure one quickly without wasting valuable Pokéballs.
Primary Habitat Locations Across Paldea
Mankey is a relatively common encounter scattered across several key regions in Paldea. You can easily spot groups of them wandering near grassy hillsides in West Province Area One and Area Three. Additional wild populations can be spotted roaming around South Province Areas One, Two, and Five.
Although the Pokédex mentions that Mankey resides up in the trees, they actually walk around openly on the ground in groups. Searching the slopes near Cortondo is often the fastest way to encounter a wild cluster early on. Keep an eye out for their distinctive beige bodies and aggressive behavior as you explore.
Guaranteed Spawn Spots and Early Routes
If you want a quick and guaranteed encounter, travel to the West Province Area One North Pokémon Center. Follow the dirt road heading southwest toward a prominent solitary tree. Underneath the shade of this tree, a set group of Mankey is almost always guaranteed to spawn.
Navigating toward these fixed spawn locations saves trainers significant time during early exploration. Utilizing ride abilities on your legendary companion makes traveling between these grassy hill zones fast and effortless. Checking these designated spots ensures you catch one right away.
Effective Catching Strategies and Prep
Securing a wild Mankey is straightforward due to its favorable catch rate. Standard Pokéballs are usually sufficient to catch one at full health without needing to inflict status conditions. However, lowering its health slightly with weak physical attacks can guarantee a successful capture on the first attempt.
Because Mankey is a pure Fighting-type Pokémon, bring along Flying or Psychic-type allies to safely absorb its attacks. Avoid using high-level moves that could accidentally knock it out during battle. Preparing a few standard Poké Balls ahead of time is all you need for a smooth encounter.
Evolving Mankey into Powerful Allies
Catching Mankey opens the door to building a formidable end-game fighter for your battle roster. Once your Mankey reaches level 28, it automatically evolves into Primeape, gaining a substantial stat boost. From there, learning the move Rage Fist allows it to eventually evolve into the powerful Ghost and Fighting-type Annihilape.

Mind Flayer Parasite Specimen BG3 Location And Story...
Navigating the complex world of Baldur's Gate 3 presents players with profound choices regarding power and morality, centered around the Mind Flayer Parasite Specimen. Harvesting these illithid tadpoles allows adventurers to unlock devastating psionic abilities that can completely alter the tide of battle. Understanding where to locate these specimens and how they impact your narrative arc is essential for optimizing your playthrough.
Key Locations in Act 1 and Act 2
During the opening chapter of your adventure, parasite specimens are primarily dropped by True Soul leaders scattered across the Wilderness. Key targets include Flind the Gnoll Warlord, True Soul Gut, Minthara, and Dror Ragzlin, each yielding a valuable tadpole upon defeat. Exploring additional areas such as the Sunlit Wetlands or the Risen Road will also reveal stray specimens on corpses and in hidden jars.
As you venture into the Shadow-Cursed Lands during Act 2, harvesting tadpoles becomes tightly linked to major faction confrontations. Defeating key figures like True Soul Nere in the Grymforge or Zealot bosses near Moonrise Towers rewards your party with further specimens. Keeping a watchful eye on defeated elite enemies ensures you never miss a chance to expand your illithid potential.
Major Caches in Act 3
Reaching the sprawling metropolis of Baldur's Gate opens up unprecedented opportunities to gather specimens in large quantities. A massive shipment containing multiple parasite specimens can be located aboard a guarded vessel near the Gray Harbor Docks in the Lower City. Infiltrating this restricted zone stealthily or by force grants immediate access to several tadpoles at once.
Additional specimens are hidden within secret facilities and underground strongholds throughout the final act. Exploring locations like the Steel Watch Foundry and the underwater Iron Throne facility yields extra specimens resting on tables and laboratory benches. Combining these discoveries allows players to fully flesh out their skill trees late in the game.
Story Consequences and Narrative Impact
Consuming Mind Flayer Parasite Specimens grants instant access to powerful Illithid Powers, ranging from utility spells to lethal psychic attacks. While early consumption carries no immediate narrative penalty, relying heavily on these powers introduces challenging skill checks at critical story junctures. Embracing the tadpole alters how certain companions view your morality and influences key interactions with the Dream Visitor.
Choosing to evolve further into a half-illithid state grants access to elite outer-tier abilities but permanently alters your character's visual appearance. Players who prefer a pristine mortal path can choose to hoard or ignore the specimens entirely without locking themselves out of victory. Balancing the temptation of alien power against your character's roleplaying alignment remains one of the game's most captivating mechanics.

Resident Evil Village Treasure Under The Stronghold Complete...
In Resident Evil Village, tracking down valuable relics is essential for maintaining enough funds to upgrade weapons and purchase valuable supplies from The Duke. Among the map markers players encounter during their journey through the village, the Treasure Under the Stronghold often causes confusion due to its placement. Knowing precisely when and where this item becomes available saves time and helps players avoid fruitless backtracking through dangerous environments.
Understanding the Stronghold Map Marker Confusion
Many players notice the treasure chest icon appearing near The Forbidden Woods early in their adventure. However, attempting to reach the item from surface level is impossible because there are no hidden entrances in the surrounding forest. The artifact is actually located deep underground within the stronghold complex itself.
Navigating the Stronghold and Defeating Urias
To reach the treasure, players must advance the main story until they enter the lycan-infested stronghold. Clearing the intense combat encounters inside leads down a massive spiral staircase toward the subterranean chambers. Defeating the formidable hammer-wielding boss, Urias, is a required milestone before the exit corridor opens.
Finding Guglielmo's Plate
After defeating Urias and collecting the story flask in the adjacent room, proceed down the exit stairs leading toward the boat dock. Directly to the left before reaching the water sits a table adorned with candles holding Guglielmo's Plate. This valuable antique plate serves as the official Treasure Under the Stronghold item.
Selling the Treasure for Maximum Value
Guglielmo's Plate has no puzzle utility and is intended solely to be sold to The Duke. Handing over this relic grants a substantial 25,000 Lei payout to fund end-game upgrades. Taking advantage of this reward before entering Heisenberg's Factory provides a necessary financial boost for powerful firearms.

Is Tekken 8 Cross Play Platforms And Multiplayer...
Tekken 8 represents a major leap forward for Bandai Namco's iconic fighting game franchise by introducing modern online infrastructure. As competitive gaming relies heavily on active player pools, understanding how matchmaking functions across systems is essential for players. This guide breaks down everything you need to know regarding cross-platform availability, multiplayer settings, and network performance.
Full Crossplay Availability Across Supported Platforms
Tekken 8 features full cross-platform compatibility across PlayStation 5, Xbox Series X/S, and PC via Steam. This allows players on any supported system to seamlessly queue against one another in global online matches. The feature unites the community into a single matchmaking pool, significantly reducing queue times.
By integrating crossplay at launch, the game ensures consistent opponent availability across all skill ranks. Whether you play on a console or a high-end desktop, the system connects you automatically. Players can also send cross-platform friend requests to form private lobbies easily.
How to Enable or Disable Crossplay Options
Managing your online compatibility settings in Tekken 8 is straightforward through the game's options menu. By default, cross-platform play is enabled to provide the widest range of opponents. Players who prefer to match exclusively with users on their specific platform can toggle this option off at any time.
Disabling crossplay may be preferred by players who want to avoid specific control configurations or potential network variance. However, keeping the feature active yields the fastest matchmaking experience across casual and ranked modes. Adjusting these preferences takes only a few seconds from the main network menu.
Multiplayer Features and Cross-Progression Limitations
While crossplay allows players to fight together, it is important to note how save data is handled. Tekken 8 does not support cross-progression between different platforms. Progress, unlocked cosmetics, and online rankings remain tied strictly to the specific platform account where they were earned.
Despite the lack of cross-progression, online lobby features fully support multi-platform interaction. You can join online battle lounges, view leaderboards, and spectate matches regardless of what hardware participants use. This creates an inclusive environment for tournaments and friendly sparring sessions.
Network Performance and Matchmaking Quality
To ensure smooth performance during cross-platform matches, Tekken 8 utilizes advanced rollback netcode. This technology minimizes input delay and compensates for distance between competing players. High-speed wired connections are recommended to maintain optimal stability across all platforms.
The game also includes indicator icons in matchmaking lobbies to show each player's platform and connection type. This transparency helps players evaluate network conditions before accepting a match. Overall, the cross-platform integration delivers a modern online experience tailored for competitive fighting game fans.

Best Weapons In Far Cry 5 For Different...
Surviving the hostile environments of Hope County requires players to constantly adapt their loadouts to match their personal playstyle. Far Cry 5 offers a vast selection of firearms, explosives, and melee options tailored for stealth, long-range engagements, or aggressive close-quarters combat. Choosing the ideal weapon loadout ensures you remain flexible when tackling cult outposts and dynamic open-world encounters.
Top Choices for Silent Infiltration and Stealth Tactics
For players who prefer liberating outposts without triggering alarms, suppressed weapons are absolute necessities. The MBP .50 sniper rifle equipped with a suppressor allows players to eliminate high-value targets from extreme distances while remaining completely undetected. Pairing this with a suppressed sidearm provides an effective backup option during tight indoor situations.
Another outstanding stealth option is the Compound Bow, which delivers silent lethal force alongside reusable ammunition. It offers exceptional versatility through interchangeable explosive and incendiary arrow types for unexpected combat escalations. Utilizing silent gear rewards patient tactics and prevents reinforcements from overwhelming your position.
Dominating Mid-Range Firefights and Assault Loadouts
When stealth fails and open conflict erupts, versatile assault rifles offer the best balance of mobility, accuracy, and stopping power. The AR-C stands out as a reliable workhorse capable of handling frequent skirmishes across both urban and rural terrain. Equipping extended magazines and extended optics ensures you stay competitive against armored cultists.
For players seeking raw firepower at moderate ranges, the AK-M delivers higher per-bullet damage at the cost of slightly increased recoil. This rifle excels at breaking through heavily fortified positions and suppressing enemy squads effectively. Keeping a balanced assault rifle ready ensures you can adapt instantly to unpredictable firefights.
Heavy Ordnance for Demolitions and Vehicle Combat
Clearing cult convoys and air support requires heavy specialized weaponry capable of dealing massive area-of-effect damage. The RAT4 rocket launcher offers lock-on guidance capabilities that make taking down enemy helicopters and armed trucks significantly easier. Carrying heavy explosive ordinance prevents dangerous vehicles from controlling the battlefield.
Complementing heavy launchers with weapons like the M60 light machine gun allows players to suppress ground forces while dealing high damage to light armor. Its massive magazine capacity lets you sustain continuous fire without frequent reload interruptions. Investing in explosive perks further maximizes the destruction you can unleash against cult strongholds.
Close-Quarters Shotguns and Handheld Sidearms
Breaching small rooms and clearing dense structures demands weapons with immediate stopping power at point-blank range. The SPAS-12 shotgun provides devastating burst damage capable of neutralizing aggressive melee cultists in a single shot. Its semi-automatic firing rate ensures quick follow-up shots when facing multiple indoor threats.
For sidearms, high-caliber revolvers like the .44 Magnum deliver dependable emergency firepower when primary weapons run empty. Combining compact shotguns and powerful handguns keeps you lethal even when maneuvering through tight, high-risk environments. Matching your weapon selection to your engagement distance guarantees optimal survival across Hope County.

XCOM 2 What to Sell Items You Can...
Managing resources in XCOM 2 can be a constant struggle, especially when funds run low and base expansion stalls. Visiting the Black Market gives commanders a direct way to trade excess alien loot for valuable supplies and intel. Knowing which items are safe to liquidate ensures you raise capital without accidentally crippling your future research projects.
Safely Liquidating Excess Alien Corpses
Enemy corpses are often the primary source of revenue when trading on the Black Market. Once you complete a specific autopsy in the Shadow Chamber or Proving Ground, any surplus bodies of that type lose much of their long-term value. Basic ADVENT Trooper and Officer remains can be liquidated in bulk once necessary armor and facility upgrades are secured.
However, you should always maintain a small safety buffer of a few corpses rather than clearing out your inventory completely. Specialized items like Mimic Beacons or Spider Suits require specific alien remains to construct in engineering. Keeping three to four bodies of each alien type guarantees you never get caught without crafting materials when new gear unlocks.
Selling Extra Loot and Unused Upgrades
Datapads and data caches offer an immediate boost to your supplies or intel reserves. Low-tier weapon attachments that no longer fit your late-game squad strategy can also be sold for quick cash. If you find yourself needing tactical advice for other strategy titles, exploring a guide like XCOM 2 What to Sell Items You Can Safely Sell for Resources can help optimize your campaign efficiency. Clearing out obsolete gear keeps your inventory lean and provides immediate economic relief.
You can also turn a profit on basic components when the Black Market marks them with high interest. While essential crafting resources should generally be hoarded, selling excess items during interest spikes yields maximum financial returns. Always weigh your current build order against market demand before completing a bulk transaction.
Crucial Resources You Should Always Keep
Certain rare materials should almost never be traded at the Black Market unless your campaign is on the brink of total failure. Elerium crystals, Alien Alloys, and Elerium Cores form the backbone of advanced weapon and armor research. Selling these vital components creates massive progression bottlenecks in the mid-to-late game.
Similarly, hold on to unique mission rewards and corpse types required for instant autopsies. Sacrificing valuable crafting supplies for short-term funding usually results in regret once higher alien tiers appear. Wise commanders balance aggressive selling with strict resource conservation to ensure continuous technological growth.
Maximizing Profits with Black Market Demands
The Black Market updates its interest list regularly throughout the campaign, offering increased payout for specific goods. Monitoring these shifting demands allows you to sell items when their value peaks. Waiting for an item to become featured can drastically increase the supplies generated per transaction.
Developing a consistent routine of checking market trends keeps your base funded without sacrificing essential tech. By selling safely and holding onto high-tier crafting ingredients, you can effortlessly maintain financial stability across your campaign. Balancing quick cash gains with long-term strategy is the ultimate key to conquering the alien threat.

XCOM 2 What to Sell Items You Can...
Managing resources in XCOM 2 can be a constant struggle, especially when funds run low and base expansion stalls. Visiting the Black Market gives commanders a direct way to trade excess alien loot for valuable supplies and intel. Knowing which items are safe to liquidate ensures you raise capital without accidentally crippling your future research projects.
Safely Liquidating Excess Alien Corpses
Enemy corpses are often the primary source of revenue when trading on the Black Market. Once you complete a specific autopsy in the Shadow Chamber or Proving Ground, any surplus bodies of that type lose much of their long-term value. Basic ADVENT Trooper and Officer remains can be liquidated in bulk once necessary armor and facility upgrades are secured.
However, you should always maintain a small safety buffer of a few corpses rather than clearing out your inventory completely. Specialized items like Mimic Beacons or Spider Suits require specific alien remains to construct in engineering. Keeping three to four bodies of each alien type guarantees you never get caught without crafting materials when new gear unlocks.
Selling Extra Loot and Unused Upgrades
Datapads and data caches offer an immediate boost to your supplies or intel reserves. Low-tier weapon attachments that no longer fit your late-game squad strategy can also be sold for quick cash. If you find yourself needing tactical advice for other strategy titles, exploring a guide like XCOM 2 What to Sell Items You Can Safely Sell for Resources can help optimize your campaign efficiency. Clearing out obsolete gear keeps your inventory lean and provides immediate economic relief.
You can also turn a profit on basic components when the Black Market marks them with high interest. While essential crafting resources should generally be hoarded, selling excess items during interest spikes yields maximum financial returns. Always weigh your current build order against market demand before completing a bulk transaction.
Crucial Resources You Should Always Keep
Certain rare materials should almost never be traded at the Black Market unless your campaign is on the brink of total failure. Elerium crystals, Alien Alloys, and Elerium Cores form the backbone of advanced weapon and armor research. Selling these vital components creates massive progression bottlenecks in the mid-to-late game.
Similarly, hold on to unique mission rewards and corpse types required for instant autopsies. Sacrificing valuable crafting supplies for short-term funding usually results in regret once higher alien tiers appear. Wise commanders balance aggressive selling with strict resource conservation to ensure continuous technological growth.
Maximizing Profits with Black Market Demands
The Black Market updates its interest list regularly throughout the campaign, offering increased payout for specific goods. Monitoring these shifting demands allows you to sell items when their value peaks. Waiting for an item to become featured can drastically increase the supplies generated per transaction.
Developing a consistent routine of checking market trends keeps your base funded without sacrificing essential tech. By selling safely and holding onto high-tier crafting ingredients, you can effortlessly maintain financial stability across your campaign. Balancing quick cash gains with long-term strategy is the ultimate key to conquering the alien threat.

Monkey D Luffy Wallpaper GIF: Best Animated Wallpaper...
Anime fans around the world frequently look for creative ways to customize their personal devices with dynamic visual backgrounds. Among the most popular choices for One Piece enthusiasts is setting up a Monkey D Luffy wallpaper GIF to showcase the future King of the Pirates in action. Dynamic backgrounds bring your desktop or mobile home screen to life through iconic transformation scenes and expressive character animations.
Classic Gear Transformations and Battle Stances
Capturing Luffy in his various combat forms provides an energetic look for high-resolution displays. Iconic moments like the activation of Gear Second with rising steam or the bouncy energy of Gear Fourth make for striking looped animations. These battle-focused GIF wallpapers work exceptionally well on desktop setups where dark or dramatic themes are preferred.
Choosing a battle scene with smooth loop transitions ensures that your screen remains visually appealing without jarring jump cuts. Fans often prefer animated sequences that feature subtle movements, such as glowing aura effects or flowing capes, to keep desktop distraction to a minimum. Balancing intense visuals with practical screen usability creates the ideal dynamic display.
Expressive Laughs and Casual Moments
Luffy is widely celebrated for his carefree personality and infectious laughter, making lighthearted scenes a wonderful choice for everyday backgrounds. Animated clips showing Luffy enjoying a feast or laughing with his crew add a sense of joy and optimism to your mobile lock screen. These cheerful themes offer a pleasant departure from typical action scenes.
Casual GIF backgrounds are especially suited for smartphones because they look natural in portrait orientation. A simple loop of Luffy tilting his straw hat or smiling against a gentle ocean breeze provides a clean yet lively aesthetic. These subtle animations elevate your device layout without draining battery life too rapidly.
Gear Fifth and Mythical Awakening Aesthetics
The introduction of Luffy's awakened Gear Fifth form has inspired a massive wave of creative animated artwork across the fanbase. With its distinctive white hair, clouds of steam, and whimsical cartoon physics, Gear Fifth offers a unique visual style for modern screens. Wallpapers featuring the Drums of Liberation motion create an unforgettable backdrop for any display.
Finding high-quality animated art featuring this mythical form allows users to highlight one of the grandest milestones in anime history. Many creators design custom loops that emphasize the glowing contrast between Luffy's white transformation and dark, stormy skies. Utilizing a well-crafted live wallpaper lets you enjoy these legendary animation sequences daily.
Optimizing Animated Wallpapers for Desktop and Mobile
To ensure smooth performance when using animated backgrounds, selecting the correct resolution and file format is essential. Using third-party engine applications allows desktop users to set seamless GIF loops or video files without causing system lag. Mobile users should look for battery-optimized live wallpaper tools to maintain full device efficiency throughout the day.
It is also helpful to match the color balance of your chosen animation with your desktop shortcuts or app icons. Selecting minimal designs with dark contrast helps keep desktop icons readable while still displaying fluid character movement. With proper setup, dynamic anime backgrounds elevate your digital workspace seamlessly.

Demi Human Queen Maggie Location and Boss Guide
Demi-Human Queen Maggie is an optional field boss in Elden Ring who presents a unique challenge due to her location and surrounding allies. Wielding a Glintstone staff, she combines physical strikes with powerful sorceries. Defeating her requires managing both her ranged attacks and the smaller enemies defending her camp.
Where to Find Demi-Human Queen Maggie
To locate Demi-Human Queen Maggie, players must travel to the volcanic region of Mt. Gelmir. She is stationed at Hermit Village, a settlement tucked along the southern cliffs. Reaching this area requires navigating around the volcano, passing through Seethewater River, and heading past Craftsman's Shack toward the village.
As you approach Hermit Village from the southwest, you will spot Maggie positioned at the far end of the settlement. She guards the area leading directly to Primeval Sorcerer Azur, an critical NPC for magic users. Players who prefer to avoid a direct confrontation can ride past her on Torrent to unlock the nearby Site of Grace first.
Key Mechanics and Boss Attacks
Maggie relies heavily on her Glintstone staff to perform sweeping physical strikes and heavy overhead slams. These physical attacks cover a wide area, making close-range positioning risky for unprepared Tarnished. Maintaining awareness of her swing range is crucial for dodging incoming damage effectively.
In addition to physical hits, Maggie casts sorceries such as Glintstone Shard and deadly Crystal Burst variants. Her spells hit hard and can easily stagger or defeat lower-level adventurers. What makes the encounter trickier is her retinue of Glintstone Sorcerers and minor demi-humans, who continually harass players throughout the fight.
Effective Strategies for Defeating Maggie
Managing the crowd is the single most important tactic when fighting Demi-Human Queen Maggie. Taking out the surrounding sorcerers first eliminates annoying long-range projectiles. Alternatively, spirit ash summons like the Lone Wolf Ashes can keep the smaller foes occupied while you focus damage on the queen.
Maggie is notably vulnerable to frostbite and physical stagger, making weapons with high posture damage extremely effective. Utilizing jump attacks or skills like Hoarfrost Stomp can rapidly weaken her defenses. Once her posture breaks, players can land critical hits to deplete her health pool safely.
Rewards for Victory
Defeating Demi-Human Queen Maggie rewards players with 13,000 Runes and a Memory Stone, which increases maximum spell slots. She also drops a Golden Rune to bolster your leveling efforts. Once vanquished, she does not respawn, allowing you to freely explore Hermit Village and interact with Sorcerer Azur.

Palworld Where To Get Quartz And The Best...
Pure Quartz is one of the most critical high-tier crafting resources in Palworld, required for producing Electric Medicine Benches, Circuit Boards, and advanced weaponry. Unlike common stone or ore, this crystalline mineral spawns almost exclusively in the frozen northern region of the map. Knowing where to locate these rare nodes and how to safely extract them will drastically shorten your late-game progression curve.
Primary Locations for Finding Pure Quartz Nodes
The vast majority of Pure Quartz deposits are concentrated across the Astral Mountains biome, located in the far northern region of Palpagos Islands. Players exploring this tundra will spot Quartz by its distinct black, spiky appearance, which sharply contrasts with the surrounding white snow. Notable cluster points include the areas surrounding the Pristine Snowfield fast travel point and the Frostbound Mountains waypoint.
Another excellent gathering zone lies near the Unthawable Lake, where multiple node spawns are situated close together along the frozen shorelines. Exploring these high-altitude cliffs often yields small groups of three to five nodes grouped in tight proximity. Marking these exact coordinates on your map makes returning for future farming rotations much easier.
Preparing for Cold Conditions and High-Level Enemies
Before venturing into the Astral Mountains, players must adequately prepare for harsh environmental hazards. Severe freezing temperatures will rapidly drain health if you are not equipped with Cold Resistant Armor or accompanied by Fire-type Pals. Bringing a Flying Mount with high speed can also help you navigate steep mountain ranges and avoid unnecessary combat encounters.
The local wildlife in the snowy northern continent features aggressive, high-level Pals and Syndicate mercenaries. Equipping high-tier pickaxes or utilizing specialized Mining Pals like Digtoise will speed up node harvesting significantly. Ensuring your inventory weight capacity is upgraded or bringing carrying-capacity Pals will help you transport heavy loads back to base.
Setting Up an Automated Quartz Mining Base
Establishing a dedicated mining outpost in the Astral Mountains is the most efficient way to farm Pure Quartz long-term. Look for flat plateau areas near cluster nodes, such as the prominent mountain peak located directly north of the PAL Genetic Research Tower Entrance. Building a Pal Box here allows your assigned base Pals to continuously mine and store the material automatically.
To run an effective automated base, assign Pals with high Mining Work Suitability, such as Astegon, Blazamut, or Anubis. You will also need Transporting Pals like Helzephyr to move the harvested Quartz directly into storage containers. Installing basic necessities like beds, food troughs, and hot springs ensures your workforce maintains high sanity and working efficiency.
Best Practical Uses for Pure Quartz in Late Game
Once collected, Pure Quartz is primarily refined into Circuit Boards using a Production Assembly Line. Circuit Boards are fundamental components for powering electric structures, automated defense turrets, and high-tech manufacturing stations. Investing early effort into securing a steady supply of Quartz guarantees your main base can support advanced technology without resource bottlenecks.

Royal Iced Tea Dreamlight Valley Recipe And Ingredient...
Exploring the magical world of Disney Dreamlight Valley allows players to gather various unique resources and whip up delicious culinary creations. Among the refreshing beverages available to craft, the Royal Iced Tea stands out as a highly valuable item for restoring energy and completing specific friendship quests. Mastering this recipe requires understanding its specific ingredient combination and knowing exactly where to forage for the necessary materials across the valley's distinct biomes.
Required Ingredients for Royal Iced Tea
To successfully prepare this elegant drink, players must acquire two essential ingredients from different locations in the game. The core component of the recipe is Majestee, a special type of tea leaf that can be found growing in specific areas. Additionally, you will need to obtain a stalk of Sugar Cane to provide the necessary sweetness that balances out the earthy flavor profile of the beverage.
Gathering these items efficiently ensures that you can craft the drink whenever your character needs a quick stamina boost during daily exploration. Keeping a small stockpile of both ingredients in your home storage chests is highly recommended for active players. Once you have both pieces ready in your inventory, you can head over to any cooking station located throughout the village to begin the process.
Where to Find Majestee and Sugar Cane
Majestee is a rare herb that primarily thrives within the ancient, magical regions of the game world, specifically around the glittering landscapes of the Overlook and the Ruins. Players should keep a close eye on the ground for small, distinct leafy plants while wandering through these specific zones. Regularly clearing out other forageable items in these areas can also help increase the respawn rate of this valuable tea resource.
Sugar Cane, on the other hand, is much easier to secure and can be reliably sourced from Goofy's Stall located in the Dazzle Beach biome. You can purchase fully grown stalks directly if they are available, or buy the seeds cheaply to plant and harvest them yourself in a matter of minutes. Growing your own crops along the sandy shores is an excellent way to maintain a steady supply of sweet ingredients without spending too many Star Coins.
Brewing Process and Energy Rewards
When you are ready to brew the beverage, interact with a cooking stove and place one Majestee and one Sugar Cane into the pot. You will also need to consume a single piece of Coal Ore from your inventory to fuel the cooking fire for the recipe. After a brief animation, the ingredients will combine perfectly to create a stunning glass of Royal Iced Tea.
Consuming this premium beverage provides a substantial boost to your character's energy bar, allowing you to run faster and perform strenuous tasks for a longer duration. It can also be gifted to various Disney and Pixar villagers to significantly increase your friendship levels during daily interactions. Knowing how to efficiently craft this drink makes managing your daily progression much smoother as you continue to revitalize the valley.

Mob Of The Dead Afterlife Symbol Locations And...
Mastering the eerie depths of Alcatraz in the iconic Call of Duty Zombies map requires players to look far beyond basic survival mechanics. One of the most fascinating aspects of this undead prison break is navigating the complex spectral plane to interact with hidden cryptic engravings. Understanding how to locate these ancient markings and input the correct codes is essential for unlocking legendary items and advancing the main storyline. This comprehensive overview ensures you can effortlessly decipher the ethereal elements scattered across the island layout.
Understanding the Spectral Plane Mechanics
Before hunting for individual markings, you must familiarize yourself with how the unique spiritual transformation system functions during a match. Entering this specialized state grants temporary supernatural capabilities, letting you bypass physical gates and spot hidden numbers glowing on the walls. Time is highly limited in this form, so planning your movement routes beforehand is vital for successful puzzle completion. Efficient positioning allows you to achieve maximum results before your spiritual energy completely depletes.
Locating the Hidden Citadel Tunnel Engravings
The primary location for inputting these supernatural codes is nestled deep within the winding spiral staircases of the Citadel Tunnels. As you descend into the dark industrial sectors, you will notice three large mechanical dials waiting at the bottom of the structure. While in your mortal form, these numeric displays appear standard and static to the naked eye. However, projecting your consciousness into the ethereal dimension reveals glowing indicators that hint at the precise combinations required.
To find the correct digits, look closely at the walls along the adjacent catwalks and hidden crevices while exploring the upper levels. These glowing numbers change dynamically with every match, meaning players must actively search the surrounding architecture rather than memorizing old solutions. Spotting these faint markings through the gloomy fog takes patience, but it provides a massive advantage for resource conservation. Once recorded, return to the master dials to enter the numerical sequence before the timer runs out.
Solving the Master Display Puzzle
Successfully entering the proper combination triggers a complete mechanical shift in the immediate environment, unlocking access to vital components hidden inside the structure. This sequence is directly tied to lowering the cage holding the warden's key, an essential asset for your escape plans. If you accidentally input an incorrect code, the dials will reset automatically without inflicting major structural damage. Coordinating with your team members ensures someone can read the markings while another operator actively manipulates the machine.
Advanced players frequently utilize this area to trigger special side objectives that yield powerful equipment upgrades and bonus score drops. Manipulating the dials in unique sequences can occasionally activate hidden audio logs that dive deeper into the dark lore of the island. Taking the time to master this system elevates your standard strategies and guarantees a smoother route toward high-round survival. Remaining calm under pressure is the ultimate key to conquering this intricate mechanical trial.

Is Far Cry 4 Cross Platform Multiplayer Compatibility...
Exploring the breathtaking open-world landscape of Kyrat is an unforgettable experience, especially when navigating its dangers alongside a companion. As gaming continues to shift toward unified ecosystems, many players revisiting this classic title wonder if they can team up across different systems. Understanding the multiplayer limitations of this specific entry helps coordinate sessions effectively with friends on other platforms.
The Core Boundaries of Kyrat Multiplayer
Far Cry 4 does not feature cross-platform multiplayer functionality for its cooperative or competitive game modes. Players exploring the Himalayan wilderness on a PlayStation console cannot connect with teammates utilizing an Xbox or a PC. This restriction means that your multiplayer network remains entirely confined to the specific hardware ecosystem where the game was purchased.
During its initial release window, the developers focused heavily on optimization for individual systems rather than bridging the gap between competing networks. Consequently, data sharing and matchmaking services operate on completely independent servers separated by platform manufacturers. This infrastructure choice prevents any form of cross-play interaction between different console families and computers.
Cross Generation Connectivity Limitations
Aside from the lack of cross-play between entirely separate brands, the title also lacks cross-generation compatibility within the same console family. For instance, a player running the game on a PlayStation 3 cannot join a lobby hosted by someone on a PlayStation 4. The same network barrier applies to users attempting to connect between the Xbox 360 and Xbox One versions.
This divide exists due to structural differences in game architecture and graphical fidelity requirements between the two hardware generations. The matchmaking systems treat each console version as a distinct entity to guarantee stable performance during intense chaotic shootouts. Therefore, matching up requires everyone in your squad to utilize the exact same generation of hardware.
Available Cooperative and Competitive Features
While unified cross-network play is unavailable, the native multiplayer options within each platform remain robust and highly engaging. The cooperative mode allows two players to conquer outposts, hijack supply trucks, and explore the massive open world together as Ajay and Hurk. However, narrative campaign missions are disabled during cooperative sessions to preserve individual story progression choices.
Additionally, the game features a competitive asymmetrical multiplayer suite called Chronicles of Kyrat, which pits heavily armed Golden Path rebels against the mystical Rakshasa warriors. These matches support up to ten players within the same platform ecosystem, offering highly tactical combat scenarios. Finding active lobbies today usually requires coordinating ahead of time with communities dedicated to the classic shooter.
How to Stay Connected With Friends
If your primary goal is to experience the cooperative elements of the game, the most reliable strategy is ensuring your entire group coordinates on a single platform choice. Many modern consoles offer backwards compatibility features that allow newer hardware to run the legacy versions smoothly. For example, playing the original version on modern machines allows you to remain within the established ecosystem framework safely.
Utilizing external community forums and platform-specific looking-for-group features can easily help you find active companions who share your hardware setup. Even without modern unified cross-play, the distinct tactical mechanics and chaotic physics of the cooperative mode make it well worth the coordination effort. Planning your sessions around these native boundaries ensures a smooth experience free from unexpected connection errors.

reap what you solo challenges Complete Reap What...
Navigating independent gaming milestones requires a mix of persistent practice and highly optimized mechanical execution. The latest trial series challenges players to step away from traditional group dynamics and prove their individual capabilities in a series of unforgiving encounters. Mastering these specialized single-player objectives allows dedicated enthusiasts to claim elite rewards while solidifying their standing within the community.
Understanding the Baseline Mechanics of Individual Trials
Entering these restricted areas completely removes the safety net of cooperative strategies and squad resurrection tools. Every enemy encounter demands absolute situational awareness and a clear understanding of your specific character limits. Success depends entirely on managing your positioning and timing defensive skills perfectly to survive overwhelming odds.
Resource management serves as another critical layer of survival when pursuing these independent achievements. Players must carefully map out their usage of restorative items and heavy cooldown abilities across consecutive combat waves. Wasting high-tier attributes early in the trial frequently leaves you vulnerable during the final boss phase.
Optimizing Equipment Loadouts for Lone Survival
Selecting the ideal gear configuration requires a deliberate shift away from specialized team roles toward self-sustaining utility options. You cannot rely on external healing support or defensive crowd control, meaning your armor and weapons must fill those tactical gaps. Prioritizing defensive health regeneration alongside consistent burst damage ensures you can sustain yourself throughout prolonged skirmishes.
Experimenting with different perk combinations allows you to adapt to the shifting demands of each specific trial map stage. Some zones favor ranged crowd management while others place you in claustrophobic rooms where high physical resistance is mandatory. Keeping a flexible inventory helps you adjust your loadout before crossing the point of no return.
Step by Step Tactical Positioning Strategies
Surviving the initial waves relies heavily on using environmental choke points to split up incoming groups of aggressive targets. Avoid standing in open spaces where enemies can easily surround your position and disrupt your casting animations. Forcing threats through narrow corridors allows you to deploy focused area-of-effect attacks with minimal personal risk.
Recognizing the visual cues of elite targets ensures you can prioritize high-threat monsters before they activate devastating status debuffs. Many failures occur when players lose track of secondary spellcasters while focusing entirely on frontline physical attackers. Eliminate the high-damage, low-health targets first to keep the overall combat pace highly manageable.
Maximizing End Game Collection Rewards
Successfully clearing the final trial criteria unlocks access to exclusive cosmetic tokens and rare structural progression materials. These specific bonuses are explicitly designed to reward player independence and showcase individual mechanical mastery within the competitive landscape. Consistently running these encounters ensures a steady income of upgrade components for your late-game builds.
Reviewing your performance metrics after each attempt reveals minor inefficiencies in your movement patterns and skill rotations. Perfecting these small mechanical details will significantly reduce your average completion times over subsequent attempts. Dedicating time to learning the underlying trial layout remains the definitive path to achieving effortless mastery.

Iron Fist Alexander Elden Ring Location and Quest...
Iron Fist Alexander is one of the most beloved and memorable non-playable characters in Elden Ring, capturing the hearts of players with his cheerful determination to become a great warrior. As a giant living jar, his journey takes him across the dangerous landscapes of the Lands Between in search of combat experience and strength. Tracking his movements is highly rewarding, as completing his comprehensive questline grants powerful talismans that significantly boost your character's offensive capabilities.
Finding Alexander in Limgrave and Gael Tunnel
Players first encounter the charismatic warrior jar in Northern Limgrave, just up the cliffside near the Saintsbridge site of grace. Alexander has managed to get himself stuck in a large hole in the ground and requires a few heavy strikes to be freed. After helping him escape, he expresses his gratitude and shares his plan to attend the upcoming combat festival located in Caelid.
Before reaching the festival grounds, Alexander can be found resting inside the Gael Tunnel, a dungeon situated right on the border between Limgrave and Caelid. He stands near a locked door at the rear of the tunnels, offering unique dialogue about his journey. Speaking to him here provides excellent narrative continuity and ensures you do not miss his early character development.
The Radahn Festival and Post Battle Remnants
The next major step in his journey takes place at Redmane Castle during the legendary Starscourge Radahn festival. Alexander can be summoned directly into the boss arena, where he courageously assists players in taking down the massive demigod. His presence in this battle makes the encounter far more manageable for struggling adventurers.
Following the defeat of Radahn, Alexander can be spotted on the battlefield scraping up the remains of fallen warriors to fill his jar body. He laments his own structural weakness during the intense fight but resolves to harden himself further. Talking to him completely at this battlefield location is required to progress his storyline further into the mid-game regions.
Journeying Through Liurnia and Mt Gelmir
After the festival, the warrior jar travels to Liurnia of the Lakes, where he unfortunately finds himself trapped in another hole just south of the Carian Study Hall. This time, simply hitting him will not work, as he needs a slippery substance like an Oil Pot to slide out safely. Crafting this item and throwing it at him allows you to free him once again with a heavy attack.
Once freed from the Liurnia shores, Alexander migrates to the boiling lava rivers of Mt. Gelmir near Fort Laiedd. He sits directly in the magma behind a Magma Wyrm field boss to bake his clay exterior and increase his durability. Standing nearby on a safe rock allows you to speak with him, prompting him to give you a special jar helmet as a token of friendship.
The Final Duel in Crumbling Farum Azula
The dramatic conclusion of Alexander's questline takes place in the late-game floating ruins of Crumbling Farum Azula. After traversing past the dragon-infested rooftops near the Dragon Temple Lift, you will find him standing proudly on a shattered stone archway. He challenges the player to a final, honorable duel to test his ultimate martial prowess.
Defeating him in this tragic combat brings his journey to an end, and he breaks apart with dignity as a true warrior. His demise rewards you with Alexander's Innards and the Shard of Alexander, which is an exceptionally powerful talisman that vastly increases the attack power of your skills.

A Strange Sunken Doorway Between Two Waterfalls Guide
Disney Dreamlight Valley introduces players to a mystical world filled with hidden puzzles and secret locations across its expansive realms. Among the many mysteries introduced in the A Rift in Time expansion is the Directive Danger questline given by EVE, which tasks players with taking photos of unusual sights around the Ancient Landing. One of the most elusive landmarks to find for this quest is a peculiar submerged entrance nestled perfectly between two crashing cascades of water.
Locating the Sunken Doorway
To find this hidden structural marvel, players need to navigate the picturesque paths of the Ancient Landing area. Head toward the secluded Overlook region, where the ambient sound of rushing water grows significantly louder as you approach the cliffside boundaries. Look closely down between the twin waterfalls cascading into the sea to spot the weathered stone outline of the ancient doorway partially submerged below the shimmering surface.
Capturing the Perfect Quest Photograph
Once you have positioned yourself safely at the edge overlooking the gorge, pull out your royal camera tool to document the discovery. You must adjust your camera angle carefully to ensure both the left and right cascading water flows frame the submerged stone frame clearly within the camera lens. Snapping a successful picture at this exact coordinates will immediately trigger the next step in the quest log, proving that you have found the correct anomaly.
Overcoming Common Tracking Issues
Many explorers find themselves struggling to get the camera to recognize this specific structure despite having the frame perfectly aligned. If the photo objective does not clear immediately, try shifting your avatar a few paces to the left or right to gain a clearer line of sight. Ensuring the time of day provides ample natural illumination can also assist the game mechanics in properly registering the sunken frame during your photographic investigation.

Is There A 15 Dollar Playstation Card And...
Finding the perfect denomination for a gaming gift card can sometimes be a confusing task, especially when you are looking for a specific budget-friendly option. Many PlayStation gamers frequently wonder if a fifteen dollar voucher exists to cover smaller DLC purchases, indie games, or quick add-ons. While standard store shelves usually display larger denominations, understanding the availability of this specific amount can save you both time and unnecessary spending.
The Availability of the Fifteen Dollar PlayStation Card
Official PlayStation Network gift cards are highly visible at major physical retailers, but they typically follow fixed pricing tiers like ten, twenty-five, and fifty dollars. However, a fifteen dollar option does officially exist in the digital marketplace as a specialized denomination. This specific amount is highly sought after by players who want to top up their virtual wallets exactly enough to cover mid-tier downloadable content without leaving leftover balances.
It is important to note that availability can vary significantly depending on your geographical location and the specific store regional focus. For instance, North American regions primarily rely on digital distribution platforms to offer this exact value, while some international storefronts carry it as a standard alternative. Knowing where to look online remains the key to unlocking this flexible payment option for your gaming needs.
Where to Find Fifteen Dollar Digital Codes Online
Since finding a physical version at your local grocery store is rare, online marketplaces serve as the primary hub for sourcing these specific vouchers. Renowned e-commerce giants and digital media stores frequently stock digital download codes that are sent directly to your email address within minutes. These platforms ensure a secure transaction process while giving you immediate access to your code so you can jump straight back into your gaming session.
When purchasing from digital platforms, always verify that the seller is authorized to prevent potential issues with invalid or regionalized activation keys. Trusted alternative web platforms offer custom gaming solutions, allowing budget-conscious gamers to find non-standard denominations safely. You can browse through reliable marketplaces like Walmart Canada or international gaming retail stores to find verified digital stock for your console profile.
How to Redeem Smaller Balances on Your Console
Once you have successfully acquired your digital code, adding the funds to your PlayStation Network wallet is an incredibly straightforward process. You can easily complete the activation directly through your PlayStation 4 or PlayStation 5 console by navigating to the store menu. From there, scroll down to the bottom options select the designated redemption screen, and carefully enter your unique twelve-digit code.
Alternatively, players who prefer managing their accounts on a mobile device or computer can log into the official web portal to apply the balance instantly. The updated funds will immediately reflect across your profile, allowing you to purchase game expansions or virtual currencies. This seamless integration ensures that even smaller gift amounts provide immediate value toward your digital library entertainment.

What to Do Before Shadowfell BG3 Important Quests...
Entering the Shadowfell in Baldur's Gate 3 represents one of the most critical turning points in the entire campaign. This narrative threshold functions as a point of no return for numerous storylines, permanently altering the state of the world. Understanding which objectives to complete beforehand ensures you do not accidentally lock yourself out of vital companion arcs and powerful gear.
Wrap Up Outstanding Act One Wilderness Quests
Many players assume that transitioning to the Shadow-Cursed Lands completely severs ties with earlier zones. While you can technically travel back to regional maps initially, stepping into the Verge of the Shadows will instantly fail several early-game storylines. It is highly recommended to finish exploring the Goblin Camp and resolving the Druid Grove situation entirely before moving forward.
Additionally, you should completely clear the Underdark and the Mountain Pass areas to maximize your party level. These subterranean and mountainous pathways host crucial world-building events and rare equipment that will become permanently inaccessible. Securing all unique items from the Adamantine Forge or the Githyanki Crèche will significantly prepare your party for the incoming difficulty spike.
Complete Moonrise Towers Infiltration Objectives
Before triggering the world state change, Moonrise Towers serves as a hub for critical rescue operations and infiltration missions. You must actively explore the prison levels to liberate the captured tieflings and Wulbren Bont's deep gnome faction. Entering the pool area beforehand immediately seals their fates, resulting in their tragic and unavoidable deaths off-screen.
The tower vendors also stock incredible endgame equipment that disappears once hostilities begin across the region. Take the time to purchase powerful weapons, specialized armors, and unique accessories from merchants like Araj Oblodra and Roah Moonglow. Engaging with these characters before the siege opens up extra dialogue options and provides long-term narrative benefits moving into later acts.
Progress Vital Companion Storylines
Your companions react heavily to the events within the gauntlet, making prior preparation essential for their personal journeys. Shadowheart requires specialized attention here, as this location serves as the culmination of her dark trials. Ensure you have high approval rating or have triggered her essential camp conversations before proceeding to the inner sanctum.
Other companions like Halsin require immediate resolution of their regional tasks before you plunge into the absolute dark. You must complete the questline to lift the shadow curse and rescue Thaniel to guarantee his permanent recruitment. Failing to assist him before the point of no return will cause him to stay behind, abandoning your party forever.
Final Party Preparation and Level Benchmarks
The encounters immediately following this transition are among the most mechanically demanding fights in the middle section of the game. It is highly advisable to reach at least level seven or eight before interacting with the glowing pool. This benchmark grants your spellcasters access to devastating tier-four magic and provides martial classes with essential survivability stats.
Stock up heavily on useful consumables like elixirs of necrotic resistance and potent healing potions from local crafters. Take a long rest to fully replenish all spell slots, short rest pools, and character abilities before making your final descent. Once you cross this threshold, you will face successive combat encounters without the safety of camp access.

PS4 PlayStation Network Sign In Failed Solutions That...
Experiencing a sudden connection failure on your PlayStation 4 can immediately halt your gaming sessions and leave you frustrated. The notorious PlayStation Network sign-in failed message is particularly vague because it rarely provides a helpful explanation for why the console cannot reach the servers. Fortunately, users can resolve this common problem by systematically troubleshooting local network configurations and system settings to restore online functionality.
Verify the Official PlayStation Network Status
Before modifying any settings on your console, you should always check the operational status of Sony's servers. Widespread network maintenance or unexpected emergency server outages frequently cause authentication issues that mimic local system hardware failures. If the official platform status page indicates that all services are fully operational, you can confidently proceed with troubleshooting your home equipment.
Understanding whether the problem originates from Sony or your home setup prevents you from wasting time on unnecessary system adjustments. If an outage is active, waiting for engineers to deploy a server-side fix remains the only viable solution. However, if the digital ecosystem is functioning perfectly for other players, the disruption likely points to a localized software hitch or router configuration error.
Execute a Complete Network Power Cycle
Rebooting your internet hardware is an incredibly reliable first response to persistent network dilemmas that traditional console restarts fail to fix. Modems and routers accumulate digital cache over long operational periods, which often causes IP address allocation conflicts with connected gaming hardware. To resolve this, completely disconnect the power cables from both devices and wait at least two minutes before plugging them back in.
This deliberate delay ensures that your internet service provider assigns a fresh connection lease to your home hardware configuration. Once your wireless networks are fully active again, turn on your console and attempt to sign in to your dashboard. This simple action clears minor hardware communication blocks and provides a clean pipeline for data transmission between the console and the distant gaming servers.
Optimize DNS and Connection Configurations
When default communication configurations fail, manually adjusting the Domain Name System parameters on your console frequently bypasses data routing restrictions. Navigate directly into the advanced internet setup interface on your machine and select the custom configuration path instead of the automated installation option. You can introduce reliable third-party public addresses, such as Google's servers, to establish a more robust digital pathway.
Inputting primary values like eight points eight points eight points eight alongside appropriate secondary figures can dramatically improve system stability. This adjustment changes how your machine decodes web addresses, allowing it to navigate around localized traffic bottlenecks. Many gamers find that shifting away from standard provider settings permanently stabilizes their online multiplayer matchmaking speeds.
Manage Account Verification Security Settings
Sometimes the authentication failure stems entirely from unresolved security alerts or outdated credential requirements tied to your profile. Logging into your account via an external browser allows you to verify if any updated user agreements require your explicit consent before console access is permitted. If you notice that your login details were adjusted recently, updating your password immediately will re-establish your secure link.
Additionally, toggle your security configuration parameters to ensure that secondary verification steps are functioning without any delay. You can use this link to check your current status if you have forgotten your account verification information or need to update your primary communication email address. Resolving credential issues through an official portal guarantees that your console will successfully pass the initial handshake process during startup.

How Many Satchel Charges For A Stone Wall
Navigating the harsh and unforgiving wilderness of Rust requires a deep understanding of defensive structures and the resources needed to breach them. For many players transitioning from the early game to mid-tier survival, understanding how to effectively penetrate a stone fortification is a crucial milestone. This knowledge allows raiding parties to optimize their inventory space and calculate the exact cost of their offensive campaigns before executing a plan.
The Mathematical Breakdown For Breaching Stone
To successfully destroy a standard stone wall using mid-tier explosives, players must deploy a total of 10 satchel charges. Each individual satchel deals a specific amount of explosive damage, meaning that trying to cut corners will leave the defensive structure standing with a fraction of its total health pool. It is highly recommended to bring an extra charge or a few fallback tools to handle unexpected duds during the chaotic raiding process.
Understanding the fundamental resources required to craft these improvised explosives is essential for planning your farming route efficiently. To assemble the necessary payload for a single wall, a player must gather significant amounts of sulfur, charcoal, and metal fragments. Coordinating this gathering phase with your team maximizes safety and ensures you have a surplus of defensive gear during the extraction process.
Managing The Volatile Nature Of Satchels
Unlike advanced military-grade explosives, satchel charges are highly unstable and rely on a randomized fuse mechanism that can disrupt the timing of a raid. A charge might detonate instantly, experience a delayed burn, or fail entirely as a dud that requires a player to manually re-ignite the fuse. This unpredictable behavior exposes raiding parties to counter-attacks from nearby defenders who hear the distinct audio cues of the ongoing breach.
To mitigate the risks associated with these volatile tools, players must learn proper placement and positioning techniques. Deploying the charges in rapid succession can save valuable seconds, but it also increases the danger of getting caught in an accidental premature blast. Creating a temporary secure perimeter or a nearby raid base allows your squad to regroup safely whenever a fuse behaves unexpectedly.
Comparing Alternative Demolition Methods
While utilizing satchels remains a popular option for budget-conscious groups, it is beneficial to analyze how this method compares to advanced endgame tools. Timed explosive charges and rockets offer significantly higher reliability and speed, allowing an organized group to wipe out a foundation in a fraction of the time. However, the advanced technical blueprints and specialized crafting benches required for military gear make them inaccessible during the first few days of a fresh server wipe.
For solo survivors or small groups looking to balance speed with resource investment, mixing different raiding tools can yield highly cost-effective results. Utilizing a pair of high-tier explosives alongside your remaining inventory can carefully chip away at the residual structural health without consuming your entire stockpile of sulfur. Evaluating the current state of your base economy will guide your tactical choices throughout the competitive season.

How to Release Pals in Palworld
Managing your creature collection in Palworld is essential for maintaining an efficient base and keeping your storage organized. As you capture more creatures during your journey, your Palbox can quickly become cluttered with duplicate entities or low-stat companions. Learning the proper methods to clear out your inventory ensures you always have room for rare discoveries.
Dropping Pals from Your Party Menu
The most straightforward method to remove a creature from your immediate inventory is by opening your main party menu during active gameplay. From this screen, you can select the specific companion you no longer wish to carry and choose the drop option. This action physically places their Pal Sphere on the ground directly in front of your character model.
While this method removes the creature from your personal lineup, it does not permanently delete them from the game world immediately. Other players in your multiplayer server can interact with the dropped sphere to claim the companion for themselves. This serves as an excellent cooperative mechanic for sharing unwanted assets with friends who are just starting out.
Permanently Deleting Pals Using the Palbox
When your base storage starts filling up, you will need a more systematic approach to manage your interface clutter. Interacting with the Palbox allows you to view your entire roster of captured creatures across multiple storage tabs. You can select any duplicate creature and use the designated discard command to permanently remove them from your save file.
Using the Palbox management system is completely irreversible, meaning any deleted creature cannot be recovered later. This method is highly recommended for filtering out common early-game creatures that provide little mechanical value to your late-game automation pipelines. Clearing this space allows your base operations to run much more smoothly without unnecessary visual distractions.
Utilizing Advanced In Game Alternatives
Players looking for alternative ways to process their excess companions can utilize advanced built-in gameplay mechanics. Instead of basic deletion, you can build a Pal Condensation Dragon to merge duplicate creatures into a single, more powerful version. This specialized structure sacrifices several identical companions to increase the partner skill level of your primary worker.
Another practical alternative involves interacting with various merchant NPCs scattered across the volcanic and desert biomes. You can sell your extra captured creatures directly to these black market traders in exchange for valuable gold coins. This economic loop transforms your unwanted inventory clutter into a useful financial resource for purchasing rare materials.

Fallout New Vegas Luck Build for Critical Hits
Creating a high-critical character in Fallout New Vegas is one of the most rewarding ways to experience the Mojave Wasteland. By maximizing your Luck stat and combining specific perks, players can turn almost every shot or strike into a devastating critical blow. This build transforms standard engagements into quick work, making high-level enemies significantly easier to handle throughout your journey.
Setting Up the SPECIAL Allocation
Starting with a high Luck attribute is essential for building a critical-focused character in the game. Setting your base Luck to nine allows you to easily reach ten later using the Lucky Implant from the New Vegas Medical Clinic. You should also maintain decent Agility and Perception to meet requirements for key combat perks down the road.
Lowering Charisma during character creation provides extra points to boost your Endurance and Strength. Higher Endurance allows you to purchase more cybernetic implants to enhance overall combat effectiveness. Balancing these attributes early ensures your character stays resilient while dealing massive damage.
Essential Perks for Maximum Damage
Selecting the right perks is crucial to boosting your critical hit chance and overall damage output. Early choices like Finesse and Built to Destroy give an immediate boost to your critical strike percentage. As you gain higher levels, picking up Better Criticals dramatically increases the bonus damage inflicted by every critical hit.
You can also tailor your setup toward specific combat styles like energy weapons, traditional guns, or unarmed strikes. Exploring options for an optimal Fallout New Vegas Luck Build for Critical Hits helps streamline your perk progression for maximum efficiency. Combining these perks with high Luck ensures that your attacks consistently land with devastating power.
Choosing Gear and Weapons
Equipment plays a major role in pushing your critical chance past standard limits. Wearing 1st Recon Beret provides an instant bonus to your critical chance, while clothing options like Joshua Graham's Armor offer further boosts. Stacking these gear bonuses creates a cumulative effect that directly improves combat results.
Pairing this gear with high critical multiplier weapons like Ratslayer or Paciencia yields incredible results. Weapons with high fire rates or large multipliers benefit the most from a Luck build setup. Maintaining your weapons regularly ensures that your damage output remains consistently high across all encounters.
Strategic Advantages in the Wasteland
Beyond combat superiority, investing heavily in Luck offers immense economic benefits throughout the Mojave. High Luck makes winning games at casino tables almost effortless, supplying you with tens of thousands of caps. These funds allow you to easily buy expensive implants, top-tier weapons, and endless supplies from vendors.
Whether taking down Deathclaws or clearing out faction strongholds, critical hits offer unmatched efficiency. The combination of easy money and extreme combat potential makes this playstyle highly popular among veterans. Mastering the mechanics behind critical damage gives you complete control over your wasteland survival.

Wolfenstein New Order Health Upgrade Locations
Surviving the relentless onslaught of mechanized forces in Wolfenstein The New Order requires more than just quick reflexes and heavy weaponry. Players looking to increase BJ Blazkowicz's resilience must track down specialized health upgrades scattered throughout the campaign. Understanding how these mechanics function is vital for conquering the game's higher difficulty settings.
The Timeline Choice and Health Mechanics
Before hunting for individual bonuses, players must understand how the early narrative choice alters gameplay rewards. Choosing the Fergus timeline grants access to permanent maximum health increases when utilizing specific resting spots. Conversely, selecting the Wyatt path pivots your collectible rewards toward armor capacity upgrades instead.
To activate these passive boosts, you must locate comfortable mattresses inside various safehouse hubs between major combat operations. Resting in an available bed initiates a short sequence that permanently raises your baseline health cap by ten points. This mechanical distinction makes the timeline choice highly influential on your long-term tactical strategy.
Early Safehouse Opportunities
The first major opportunity to enhance your maximum vitality occurs during your initial visit to the Kreisau Circle safehouse. Players should navigate to the top floor of the hidden headquarters to locate the designated sleeping quarters. Interacting with the tidy mattress here instantly provides your very first statutory health increase.
As the narrative progresses and you return to the resistance base during subsequent chapters, new opportunities to rest will emerge. Checking the bedrooms during each safehouse interlude ensures that you do not miss these easy upgrades before embarking on dangerous missions. Regular visits to the upper floors become a habit for seasoned completionists seeking maximum durability.
Advanced Chapter Upgrades
Beyond the primary safehouse hub, players can discover additional hidden items that temporarily overcharge or permanently affect vitality parameters. Searching ventilation shafts and hidden wall safes during linear combat levels frequently rewards observant explorers with vital supplies. Keeping a close eye on dark corners can reveal tucked-away items that give you a massive edge in combat.
Many of these hidden storage areas require specific tools or keys acquired by thoroughly exploring adjacent rooms. Taking the time to search office desks and behind large industrial machinery often yields excellent protective dividends. These additional resources complement your permanent baseline increases perfectly during intense boss encounters.
Maximizing Your Combat Effectiveness
Accumulating multiple health upgrades transforms how you approach major firefights against elite global forces. A larger health pool allows players to sustain significantly more damage before entering the critical, slow-healing injury state. This gives you greater freedom to utilize aggressive dual-wielding strategies during chaotic skirmishes.
Combining these health enhancements with tactical cover usage ensures that you can survive the toughest combat zones. Planning your path around timeline specific collectibles maximizes your character efficiency across the entire campaign duration. Ultimately, prioritizing these locations rewards players with a much smoother path toward total victory.
Tracking Your Progression Progress
Players can easily monitor their collection status by accessing the internal perks and collectibles menu during gameplay. This interface displays how many upgrades you have successfully secured and highlights your current maximum capacity. Keeping track of this data ensures that your character development remains aligned with the escalating difficulty of later stages.
If you happen to miss an upgrade during your initial playthrough, the game allows you to replay individual chapters from the main menu. This feature provides a convenient way to clean up missing items without restarting the entire story from scratch. Utilizing chapter select ensures that every player can fully optimize their character for the final battle.

Final Fantasy 7 Gameshark Codes And How To...
Navigating the massive world of the original Final Fantasy 7 on the PlayStation 1 can be an incredibly rewarding adventure, but the steep grinding requirements often slow down your progression. For decades, players looking to bypass the tedious leveling phases or experiment with hidden mechanics have relied on external hardware solutions. Understanding how to implement classic modification parameters allows modern fans to experience this legendary RPG from a completely fresh perspective.
The History of PlayStation Enhancement Hardware
During the late 1990s, third-party peripheral devices completely transformed the way console enthusiasts interacted with their software libraries. These unique tools functioned by temporarily intercepting system memory addresses right before the game loaded its primary data assets. For many dedicated RPG players, utilizing an external modification system provided a reliable method to customize individual item values and character statistics.
As the popular role-playing game gained massive global acclaim, enthusiasts quickly realized that standard gameplay boundaries could be completely rewritten. Entering complex alphanumeric sequences allowed users to manipulate active party configurations, unlock rare materia configurations, and even access unused development assets hidden deep within the code layout. This era of digital experimentation established a unique subculture that continues to thrive among retro gaming communities today.
How to Input Codes on Original Hardware
Executing these modifications on original hardware requires connecting your specialized hardware device directly into the parallel data port located at the back of the early console revision. Once the peripheral interface initializes on your television screen, you must navigate to the code entry menu to input your custom parameters manually. Accurate formatting is essential, as a single typographical error within the twelve-character hexadecimal sequence will completely prevent the modification from activating.
After saving your custom parameters to the device storage unit, you can launch the software application with the desired modifications active. Many retro enthusiasts prefer using a comprehensive digital resource to track active modification sequences and confirm operational stability across different regional software versions. If you encounter unexpected system freezes or visual glitches during character transitions, disabling overlapping memory parameters usually stabilizes the active operational environment.
Popular Custom Parameters for Character Customization
The most sought-after hexadecimal parameters for this specific title typically focus on reducing the massive amount of hours required to maximize individual character statistics. For example, specific code strings grant infinite Gil reserves instantly, removing all financial limitations when purchasing high-tier equipment in late-game towns. Other popular options freeze health point variables at maximum thresholds, allowing players to focus entirely on the grand narrative without worrying about difficult boss fights.
Advanced enthusiasts frequently implement complex memory parameters to manipulate active battle mechanics or explore out-of-bounds terrain. By shifting specific value pointers, you can bypass forced party restrictions and keep unique guest characters in your active group for the entire journey. Experimenting with these deep code layers provides a fascinating look into how the original developers structured the fundamental progression tracking mechanics.
Balancing Your Modification Settings for Pacing
Ultimately, choosing to apply these historical shortcuts depends entirely on your personal gameplay goals and available free schedule. Some purists prefer the traditional difficulty scaling, arguing that heavy modifications diminish the emotional weight of overcoming major tactical hurdles. However, if your primary goal is to revisit specific story milestones or test creative party setups, a targeted modification approach is highly recommended.
By understanding the mechanics behind these classic memory parameters, you can customize your retro journey to match your specific playstyle preferences perfectly. This curated approach preserves the nostalgic atmosphere of the original release while providing modern flexibility for your personal entertainment schedule. Preparing your modification list ahead of time ensures a stable, highly enjoyable playthrough from the opening reactor raid to the final showdown.

Desert Eagle Midnight Storm Skin Guide And Weapon...
The Desert Eagle remains one of the most iconic and powerful pistols in tactical shooters, celebrated for its high risk and massive reward structure. Among its visually striking cosmetic options, the Midnight Storm skin offers a beautiful aesthetic that heavily appeals to collectors and active players alike. Understanding the history, design elements, and underlying weapon mechanics of this particular firearm helps players maximize their effectiveness on the virtual battlefield.
Design Origins and Visual Appeal
Introduced as part of The Rising Sun Collection, the Midnight Storm skin showcases a distinct aesthetic heavily inspired by traditional Japanese artwork. The entire body of the pistol is adorned with a smooth, flowing wave pattern rendered in various deep shades of dark blue and sea green. This unique design gives the weapon a serene yet deadly appearance that stands out gracefully during intense combat engagements.
Because the finish relies on a pattern index, the exact positioning of the waves can shift slightly depending on the specific weapon item you acquire. This subtle variance adds an extra layer of collectability for enthusiasts who enjoy hunting down perfect visual placements. The clean lines ensure that the cosmetic remains highly appealing across all wear levels from Factory New down to Battle-Scarred conditions.
Rarity and Marketplace Value
Classified as an Industrial Grade skin, the Midnight Storm occupies an interesting niche within the global weapon marketplace. While it is not the rarest tier available in the game, its inclusion in an exclusive, older collection means it is no longer part of the standard active drop pool. This limited availability has caused its market value to remain remarkably stable over the years compared to more common handgun cosmetics.
Active players looking to acquire this cosmetic will find that prices fluctuate steadily depending on the current exterior wear level. Factory New versions fetch a premium price because they present the wave artwork with minimal scratches or paint degradation. Investing in a Minimal Wear or Field-Tested version can provide a budget-friendly alternative while still maintaining excellent visual clarity in first-person view.
Mastering the Desert Eagle Mechanics
Operating the underlying handgun effectively requires an immense amount of patience, precise crosshair placement, and thorough recoil management. The weapon is famously capable of eliminating an armored opponent with a single, well-placed shot to the head at long distances. However, missing that initial shot leaves the user highly vulnerable due to the pistol's slow recovery time and small magazine capacity.
To counteract the severe accuracy penalty caused by firing repeatedly, players must practice the art of counter-strafing to bring their momentum to a complete stop. Waiting a brief moment between individual trigger pulls allows the weapon's crosshair to completely reset to its baseline precision level. Crouching before firing can also significantly compress the bullet spread pattern, making long-range duels much more reliable to win.
Tactical Role in Economy Rounds
In competitive match structures, purchasing this high-caliber pistol serves as a primary tool for turning the tide during low-investment team rounds. A skilled marksman can easily challenge opponents holding expensive rifles, effectively stealing high-tier hardware for their own team. This makes the weapon a high-impact financial investment that can rapidly swing the momentum of an entire half.
However, players should avoid purchasing this weapon if they cannot comfortably fund their utility items or armor setups in subsequent rounds. Balancing your personal economy ensures that a failed eco-round does not permanently cripple your team's tactical progression. When utilized with discipline and sharp mechanical execution, a decorated pistol can become the ultimate equalizer on the field.

How To Play Rocket League Complete Beginner Guide
Entering the high-octane arena of Rocket League can be both exhilarating and intimidating for newcomers. Combining the fast-paced nature of arcade soccer with vehicular mayhem requires a unique blend of coordination and spatial awareness. By understanding the core mechanics early on, you can smooth out your learning curve and start contributing to your team's victories right away.
Mastering Basic Car Control and Camera Settings
Before chasing after the ball, rookies must become comfortable handling their motorized vehicles. Spending time in the training menu allows you to practice acceleration, braking, and precise turning radius mechanics without the pressure of a real match. Learning how to manage your basic movements forms the foundation of all advanced maneuvers.
Adjusting the default camera configuration is another vital step for every new pilot on the field. Activating the ball camera feature allows your perspective to remain automatically locked onto the target at all times. This tracking mechanic prevents you from losing sight of the action while navigating the corners of the pitch.
Understanding Ball Dynamics and Proper Timing
Predicting the bounce of a massive soccer ball requires patience and careful observation. Instead of charging forward blindly, try to read the trajectory as the ball interacts with the arena walls and ceiling. Waiting for the optimal moment to strike ensures you make solid contact rather than completely missing your target.
Executing a standard flip just as your vehicle touches the ball delivers a massive boost in power. This basic technique helps clear the ball away from danger or launch a strong offensive strike toward the opponent's net. Mastering these fundamental collisions will immediately elevate your overall performance on the pitch.
Managing Boost Resources and Field Positioning
Struggling to maintain momentum is a common hurdle for players exploring the game for the first time. The glowing pads scattered across the floor automatically replenish your acceleration reserves when collected. Balancing your speed requirements with resource consumption ensures you always have energy left for critical defensive saves.
Maintaining a balanced formation with your teammates prevents the opposing squad from securing easy open-net goals. Avoid grouping too closely with your allies, as crowding the same space leaves your half of the field completely exposed. Spreading out naturally across the pitch allows your team to transition seamlessly between offense and defense.
Developing Basic Team Communication
Succeeding in multiplayer matchmaking relies heavily on proper coordination with your fellow drivers. Utilizing the integrated quick chat system allows you to signal your intentions, such as calling for defensive duties or launching a strike. Clear communication minimizes accidental collisions and misunderstandings between teammates during chaotic scrambles.
Reviewing your own gameplay match replays is an exceptional method for spotting positioning mistakes. Observing your movements from an overhead perspective reveals habits that might be holding your progression back. Committing to steady, incremental practice sessions transforms raw beginners into confident arena competitors over time.

YuGiOh 7 Trials To Glory Cheats Codes And...
Released during the golden era of the Game Boy Advance, Yu-Gi-Oh! 7 Trials to Glory: World Championship Tournament 2005 remains a favorite among strategic card duelists. Navigating this classic title effectively requires a solid understanding of deck construction, localized tournament requirements, and password systems. Utilizing the built-in mechanics effectively allows players to bypass long grinding sessions and experience high-level play much faster.
Unlocking Powerful Cards with the Password Machine
The in-game password machine serves as the primary method for adding specific, rare cards directly to your digital collection. By inputting the official eight-digit codes found on real-world trading cards, you can instantly make them available for purchase at the local card shop. This system allows you to build competitive deck archetypes early in the campaign without relying entirely on randomized booster pack rewards.
To utilize this feature successfully, you must accumulate a sufficient amount of Duel Points by defeating various opponents around the game world. Each card unlocked via password carries a specific point cost before it can be moved into your active trunk repository. Prioritizing staple spell cards and high-attack monster cards ensures you spend your hard-earned currency efficiently.
Mastering the Multi-Deck Management System
Unlike previous entries in the handheld franchise, this specific edition grants players the ability to save up to twenty separate deck configurations simultaneously. This expanded storage capacity allows you to maintain unique strategies tailored to different tournament formats without constantly dismantling your primary build. Transitioning between an aggressive beatdown strategy and a defensive control layout becomes entirely seamless.
Developing dedicated decks for specialized limitations is crucial for clearing late-game challenges efficiently. Certain tournament arenas will explicitly restrict specific card types or enforce unique attribute requirements on your active lineup. Keeping adaptable variations ready ensures you can enter any sudden challenge without wasting time adjustments.
Maximizing Tournament Efficiency and Duel Points
Winning localized tournaments stands out as the most reliable method for gathering high-value booster packs and boosting your overall duelist ranking. Paying close attention to the calendar system helps you plan your active schedule around lucrative weekly events. Defeating prominent duelists during these official gatherings yields significantly higher rewards than standard street encounters.
Maintaining a high win-streak bonus will multiply the total points received at the conclusion of each match. Focus on reducing unnecessary damage during the early turns to secure clean victories that maximize your performance ratings. The accumulated currency can then be funneled directly back into the card shop to optimize your deck utility.
Navigating End-Game Limitation Trials
The final tiers of the campaign introduce incredibly strict rules that test your absolute mastery of mechanical card interactions. Facing powerful opponents under heavy restrictions, such as the total prohibition of standard spell cards, demands creative deck alterations. Relying on continuous trap cards and specialized monster effects helps fill the utility gap during these difficult rounds.
Studying the specific patterns of major rivals gives you a substantial tactical advantage before the duel even initiates. Many opponents rely heavily on signature fusion monsters or specific field advantages that can be disrupted with targeted counter strategies. Adjusting your side deck carefully between rounds will provide the leverage needed to secure the ultimate championship title.

Can You Delete A Steam Review Complete Review...
Sharing your gaming experiences on Steam is a great way to help the community make informed purchasing decisions. However, there are times when you might want to modify or completely remove your past feedback. Fortunately, Valve provides users with full control over their content, allowing for easy updates and deletions as opinions change over time.
How to Remove a Review Permanently
If you decide that a piece of feedback no longer represents your views, removing it is a straightforward process. You simply need to navigate to your Steam profile, locate the specific review from your dedicated reviews page, and click the delete option. The system processes this request instantly, wiping the content from both the store page and your public profile history.It is important to note that once you remove a review, the action cannot be undone. If you change your mind later, you will have to compose a completely new critique from scratch. Many players choose this route when a game undergoes massive updates that resolve early technical glitches or mechanical bugs.
Editing and Updating Existing Feedback
Instead of completely removing your evaluation, modifying the existing text is often a more practical solution. Steam allows you to alter your written commentary and even switch your overall recommendation from positive to negative at any time. This flexibility ensures that the active community receives accurate updates on long-term game support.
When you edit a review, the platform automatically appends a note indicating the date of the latest edit. This transparency helps other shoppers understand that your perspective has evolved based on newer gameplay experiences. It also serves as a valuable metric for developers tracking community sentiment over prolonged development cycles.
Managing Comments and Privacy Settings
User feedback often attracts a variety of responses from fellow players, which can sometimes lead to unwanted discussions. Within your review management dashboard, you can toggle comment permissions to restrict who can reply to your thoughts. You can choose to allow open discussion, limit comments to your friends list, or disable the comment section entirely.
Additionally, adjusting your overall profile privacy settings can hide your game ownership statistics and past critiques from the general public. Keeping your digital footprint managed ensures a comfortable browsing environment while still supporting the ecosystem. Taking advantage of these built-in dashboard tools gives you total control over how your evaluations interact with the broader community.

How To Free Sazza BG3 Complete Goblin Camp...
Navigating the rich storyline of Baldur's Gate 3 often presents players with difficult moral choices and hidden opportunities. One early-game quest involves Sazza, a captive goblin whose survival can significantly alter your approach to the unfolding conflict. Rescuing her not only grants safe passage into a hostile stronghold but also sets off a chain of events with long-term consequences.
Intervening at the Druid Grove
Your journey begins within the makeshift prison of the Emerald Grove, where an enraged tiefling intends to execute the caged goblin. Players must step into the line of fire and use dialogue checks to diffuse the situation before she is killed. Successfully deflecting the threat leaves Sazza alive and willing to negotiate a path out of the settlement.
To progress this storyline, you must pick the lock on her cage while avoiding the gaze of nearby guards. It is highly recommended to secure the immediate area beforehand so you can speak to her without triggering hostile reactions from the residents. Once unlocked, she will agree to follow your party as long as you can remain undetected during your departure.
Navigating the Secret Passage
Escaping through the main gate of the grove is virtually impossible without turning the entire camp against you. Instead, look for a hidden stone door along the cliffside that leads directly into the underground passage. This subterranean route is filled with active traps and hostile stone guardians that can easily eliminate a low-health companion.
Clearing these threats out beforehand ensures that your escape remains smooth and completely untroubled. Once you successfully guide her out of the caverns, she will thank your party and promise to introduce you to her leadership. This successful extraction marks the completion of the first major phase of her multi-part rescue achievement.
Securing Passage at the Outpost
Upon arriving at the outer gates of the defiled temple, the local guards will immediately halt your party. Sazza will quickly step forward to vouch for your character, allowing you to bypass standard intimidation or deception checks. This diplomatic entry saves valuable resources and lets you explore the settlement without raising immediate alarms.
Following her inside will eventually lead you directly to the chamber of the drow commander, Minthara. The absolute cult leader will initially express displeasure with her performance and threaten to feed her to the spiders. Players must intervene once again during this tense conversation to convince the commander to spare her life.
Long Term Impacts and Achievements
Keeping this specific goblin alive requires consistent monitoring across multiple acts of the campaign. If you plan to recruit certain companions down the line, managing your reputation among the factions becomes incredibly vital. Navigating these delicate political systems highlights the deep player freedom built into the foundational design of the game.
Successfully protecting her through these various trials eventually unlocks unique dialogue options during later chapters. For dedicated completionists, this difficult path is mandatory to secure specific achievements tied to saving her from consecutive instances of peril. Balancing these decisions provides a highly rewarding narrative layer to your adventure.

Ben 10 Protector Of Earth Cheats Complete Cheat...
Reliving the classic PlayStation 2 and PSP era often brings players back to the action-packed adventures of the popular Cartoon Network hero. Ben 10 Protector of Earth remains a beloved title for fans who want to control powerful alien forms like Heatblast, Four Arms, and XLR8. To fully maximize the gameplay experience and bypass difficult combat encounters, using built-in developer secrets can be incredibly helpful.
How to Access the Secret Code Menu
Before you can activate any special status adjustments or unlock advanced options, you must locate the correct entry screen. Launch the game and navigate directly to the main options menu from the start screen. Inside this menu, you will find a dedicated subsection specifically labeled for entering secrets.
Inputting these commands requires a specific sequence of button presses rather than traditional text entry. Once you enter the combinations correctly, the game will immediately flash a confirmation message to verify the effect. This system allows players to customize their gameplay experience without needing external modification tools.
Unlocking All Alien Forms and Master Control
The most sought-after combinations in the entire game revolve around alien forms and resource management. Entering the maximum upgrade codes allows players to utilize advanced combat combinations right from the opening levels. This heavily shifts the gameplay dynamic, giving you full access to Ben's powerful arsenal instantly.
For players looking to enjoy the narrative without restriction, the Master Control code completely removes the standard transformation cooldown timer. This allows for seamless transitions between different forms during intense boss battles. Embracing these mechanics turns the game into a true sandbox experience for fans of the original animated series.
Activating Invincibility and Visual Enhancements
If you are struggling with specific platforming sections or aggressive enemy waves, defensive options are available. The invincibility combination removes all threat of taking damage from Vilgax's robotic armies. This is an exceptional tool for younger players or those looking to complete speedruns.
Additionally, several cosmetic modifiers can alter the overall visual presentation of the stages. These fun additions provide a fresh perspective on familiar environments and encourage multiple playthroughs. Activating these modes guarantees hours of entertainment while exploring the diverse regional landscapes.
Maximizing Rewards and Level Progression
Gathering enough experience to purchase every single combat combo naturally can take a significant amount of time. Utilizing specific reward multipliers accelerates your character progression, letting you enjoy advanced moves much faster. This ensures you can experience the absolute best variations of each alien's moveset early on.
Combining these progression boosters with gameplay modifiers completely alters how you approach standard challenges. These features provide an excellent balance between maintaining a fun challenge and bypassing repetitive grinding sections. Embracing these historical secrets offers the perfect opportunity to experience this retro masterpiece in a brand-new way.

Terminal Table Persona 3 Reload Weakness Enemy Weakness...
Navigating the towering floors of Tartarus in Persona 3 Reload requires deep tactical knowledge of enemy affinities and team compositions. Players exploring the Tziah block will eventually cross paths with the intimidating Terminal Table mini-boss. Understanding how to exploit this particular shadow's weaknesses is the absolute key to surviving the encounter without burning through your precious healing resources.
Understanding the Terminal Table Typing
The Terminal Table is notorious for utilizing devastating light-based elemental attacks to catch unprepared players off guard. It boasts complete immunity to several types of magic, rendering standard offensive strategies highly ineffective. To successfully counter its defensive traits, you must analyze its behavioral patterns and shift your primary party roles accordingly.
Taking down this unique opponent requires a dramatic shift away from magical spam toward a more precise tactical setup. You can use the Persona 3 Reload enemy weaknesses guide to learn how physical and elemental attributes function across major boss fights. Maximizing this mechanical knowledge ensures your active squad stays safe during unexpected difficulty spikes.
Exploiting the Core Weakness
Unlike many standard shadows in the surrounding block, the Terminal Table is highly vulnerable to Strike damage. Characters who specialize in heavy physical bludgeoning skills can easily knock the target down to initiate a powerful All-Out Attack. Utilizing characters like Akihiko Sanada guarantees a consistent stream of critical knockdowns throughout the confrontation.
It is important to manage your party's health pool closely since physical techniques cost hit points to execute. Relying on support abilities to constantly buff your squad's accuracy will ensure these high-impact strikes rarely miss their mark. Forcing the boss into a perpetual downed state remains the safest path to absolute victory.Managing Defensive Resistances
The Terminal Table features high resistance to regular magic, making elemental casters less optimal for raw damage output during this cycle. Attempting to chip away at its health using fire, ice, or lightning will only draw out the battle unnecessarily. Instead, your magic users should focus entirely on casting defensive barriers or applying debilitating status effects.
Inflicting status ailments like Distress can significantly lower the enemy's evasion rate while increasing your team's critical hit ratios. This supportive strategy opens up massive opportunities for your physical damage dealers to finish the match early. Balancing group utility with raw power makes the entire exploration process much smoother.
Recommended Team Formations
Building a balanced team configuration is vital when dealing with the high damage output of the Tziah block bosses. Incorporating a dedicated healer ensures that the party can freely expend health points on aggressive physical strike skills. Keeping a diverse inventory of active Personas for the protagonist provides excellent backup coverage for any situation.
Ensuring that your team remains properly leveled before entering the boss room will prevent sudden wipeouts from unexpected light skills. By prioritizing strike affinity and maintaining smart status control, players can confidently overcome the challenge. Embracing these core tactical mechanics unlocks the true potential of your dungeon crawling adventures.

Empyrion Galactic Survival Console Commands List
Empyrion Galactic Survival offers a vast open-world space sandbox where players can build capital vessels, explore diverse planets, and survive harsh environments. Managing these expansive worlds often requires using administrative tools to fix glitches or test building designs safely. Utilizing the built-in developer console allows players to customize their sandbox experience and manage server environments efficiently.
How to Access the Developer Console
To begin entering commands, players need to press the tilde key during an active game session to open the input window. This overlay allows you to type specific strings that directly alter game variables, spawn resources, or modify environmental conditions. Server administrators frequently rely on these inputs to maintain performance and assist players who encounter physical terrain bugs.
Essential Survival and Utility Commands
The most common commands focus on player state modifications and resource acquisition during building testing phases. Typing the godmode command grants complete invulnerability and allows free-flying movement through solid structures for efficient building inspection. Additionally, the itemadm command opens a dedicated menu for instantly spawning blocks, tools, and rare materials without gathering components manually.
Time and Environment Manipulation
Controlling the planetary environment is crucial when documenting creations or waiting out hazardous weather events. Players can advance local planetary time instantly by using the time command followed by a specific numerical value. This feature helps creators capture their massive capital vessels under optimal lighting conditions or bypass dangerous nighttime cycles on hostile alien worlds.
Server Management and Technical Controls
For multiplayer hosts, keeping the universe running smoothly requires tracking entity counts and managing player permissions directly from the interface. The administrative tools allow hosts to find lost vessels, teleport struggling faction members, or clear detached debris that impacts simulation performance. Utilizing these structural parameters ensures that large-scale community universes remain stable over long play sessions.

Best Weapon In Stardew Valley
Mastering combat in Stardew Valley requires shifting your focus from standard farming chores to high-stakes cavern exploration. As players descend into the game's toughest areas like the Skull Cavern and the Volcano Dungeon, dealing sufficient damage becomes essential for survival. Having the right offensive gear ensures that dangerous monsters can be cleared quickly before they overwhelm your character.
The Supremacy of the Infinity Blade
When evaluating the absolute peak of offensive power, the Infinity Blade stands out as the ultimate choice for experienced players. This incredible sword delivers unmatched base damage along with helpful defensive stats that keep you safe during intense encounters. To obtain it, you must take your base Galaxy Sword to the Volcano Forge on Ginger Island and upgrade it using three Galaxy Souls and sixty Cinder Shards.
The physical layout of combat changes dramatically once you wield this endgame blade due to its swift attack speed and sweeping radius. It easily outclasses intermediate weapons like the Obsidian Edge or the Yeti Tooth Sword that players collect during early mine runs. Investing your rare resources into this upgrade ensures that your endgame expeditions remain highly efficient and profitable.
Unlocking the Power of the Volcano Forge
Reaching the final forge room unlocks a deep customization mechanic that completely reshapes how your weapons behave in battle. Players can use distinct gems to permanently enchant their swords, clubs, or daggers with custom statistical bonuses. For example, forging with rubies will directly boost your raw damage output, while emeralds will noticeably increase your attack speed.
Many combat enthusiasts prefer to add specialized enchantments like Crusader or Vampiric to their primary loadout. The Crusader enchantment is particularly useful because it allows you to permanently eliminate annoying mummies without relying on explosive bombs. Exploring these diverse forging combinations helps fans determine which tactical setup best suits their personal playstyle.
Choosing Between Swords Clubs and Daggers
While swords remain the most popular choice due to their balanced defensive blocking maneuver, other weapon classes offer unique advantages. Clubs and hammers deal massive knockback damage that ignores enemy armor entirely, making them excellent for controlling large groups of monsters. The specialized heavy slam alternate attack can instantly clear out swarms of flying serpents before they can land a hit on your character.
On the other hand, daggers appeal to players who favor rapid singular strikes and high critical hit chances. Although they lack a wide sweeping arc, their special stabbing combo can melt isolated high-health targets very quickly. Ultimately, understanding how these distinct weapon archetypes interact with different monsters will drastically enhance your overall efficiency while exploring deep dungeons.

Tactical Awareness That Leads to Victory
In the highly competitive arena of modern strategy gaming, raw mechanical skill can only carry a player so far before hitting a developmental ceiling. True dominance requires a profound mental shift toward understanding the broader flow of the digital battlefield rather than just focusing on immediate individual actions. Developing elite levels of tactical awareness separates standard players from legendary champions who consistently find ways to secure victory.
The Core Elements of In-Game Perception
Achieving victory begins with a comprehensive assessment of both visible and hidden variables across the active map geometry. Top players learn to read subtle movements in enemy positioning to accurately predict forthcoming spatial strategies or sudden ambushes. By maintaining a high level of situational mindfulness, you can proactively neutralize opposing initiatives before they grow into severe threats.
Furthermore, recognizing specific operational windows allows competitive teams to exploit brief moments of vulnerability in an opponent's defensive posture. Failing to track resource distribution or map control metrics often results in catastrophic miscalculations during critical late-game team fights. Cultivating sharp observation habits ensures that every decision rests on objective real-time data instead of desperate guesswork.
Balancing Aggression with Defensive Stability
Many aspiring competitors mistake constant hyper-aggressive posturing for optimal high-level play when true strategic mastery demands balance. Rushing blindly into uncharted territory without establishing proper logistical backup lines frequently invites immediate counter-attacks. Elite gamers prioritize creating a secure defensive foundation before executing expansive operations across the digital field.
Maintaining absolute mental clarity under intense competitive pressure directly determines the long-term sustainability of your chosen formation. When an unexpected tactical crisis develops, experienced leaders remain patient to avoid making panicked directional choices that ruin their formation. By systematically weighing potential risks against immediate rewards, you construct a much smoother pathway toward ultimate success.
Optimizing Strategic Economy and Logistics
Behind every brilliant map rotation lies a highly efficient economic framework that steadily supplies your front-line forces. Dedicated enthusiasts can access specialized portals like the M88 Sport login platform to study how complex strategic systems function at professional tournament tiers. Managing your distributed assets fluidly prevents sudden supply depletion when matches stretch into grueling endurance trials.
Learning how to supervise multiple simultaneous production channels significantly enhances overall battlefield efficiency over extended gaming sessions. Top-tier competitors avoid wasting vital supplies on brief advantages that offer minimal long-term value to the collective squad. This disciplined approach to asset distribution guarantees that your team retains a massive power reserve during final high-stakes conflicts.
Cultivating the Post-Match Analytical Mindset
True strategic advancement relies heavily on conducting disciplined reviews of past matches to isolate specific decision-making errors. Reviewing personal recordings exposes subtle positional mistakes that require swift adjustments before entering your next competitive environment. Over time, this targeted analytical study shapes the sharp intuitive reflexes needed to command complex tactical engagements easily.
Every single competitive defeat serves as an invaluable learning tool that expands your overall understanding of strategic theory. Embracing a progressive developmental mindset helps transform frustrating execution errors into powerful strategic insights for subsequent gaming tournaments. Through continuous focused practice and rigorous self-evaluation, any dedicated player can elevate their tactical awareness to elite levels.